I recently pulled a SATA hard drive out of a Linux box that I wanted to grab some files off of. I only had my Mac on hand, and I had a USB 3.0 to SATA hard drive adapter at the ready.
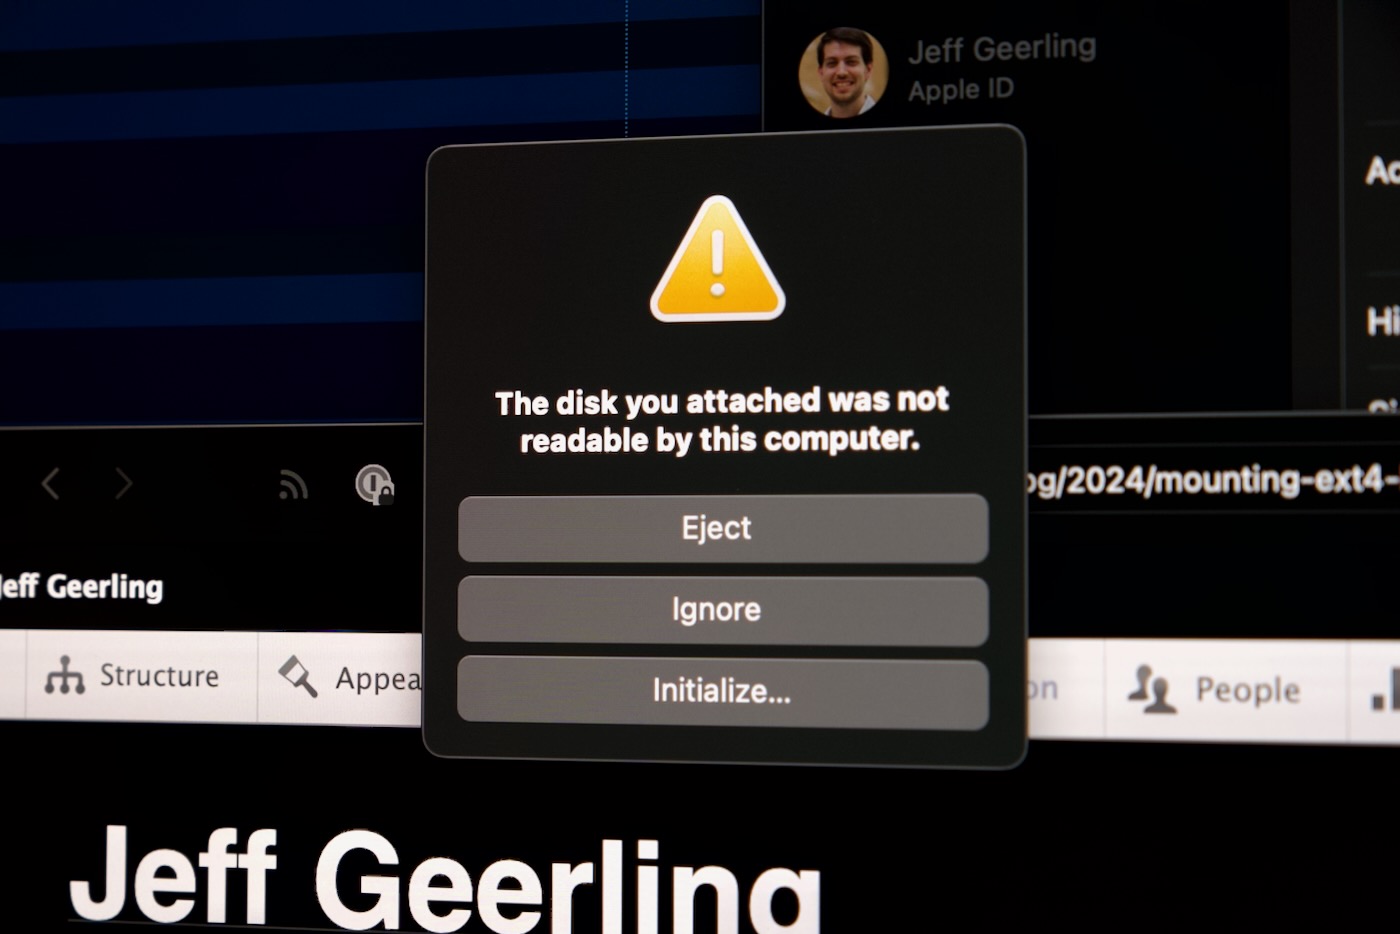
But when I plugged in the hard drive, macOS said it couldn't recognize the disk.

Makes sense, because macOS includes support for Apple's filesystems, not Linux (or even NTFS, Windows' preferred filesystem). There are commercial solutions you can buy, like Paragon Software's extFS for Mac, but that costs $39, and I don't want to deal with the licensing issues that may exist there if I just want to grab a few files off one hard drive.
Luckily, there are some open source libraries that allow at least read only access to ext4-formatted disks on macOS. Let's install them and use them to mount the drive:
First, install macfuse, using homebrew:
brew install --cask macfuse
This will likely ask you for your sudo password, as it needs to install a kernel extension.
After that's done, you'll need to manually clone and compile ext4fuse:
git clone https://github.com/gerard/ext4fuse.git && cd "$(basename "$_" .git)"
make
Then create a mount point and mount your external hard drive. If you don't know which drive is the external drive, use diskutil list and figure out which one it is—in my case it was /dev/disk5 (external, physical):
$ diskutil list
/dev/disk5 (external, physical):
   #:                       TYPE NAME                    SIZE       IDENTIFIER
   0:      GUID_partition_scheme                        *20.0 TB    disk5
   1:       Microsoft Basic Data                         20.0 TB    disk5s1
Next, create a mount point for the disk, and then attempt mounting it there:
mkdir ~/ext4_mount
sudo ./ext4fuse /dev/disk5s1 ~/ext4_mount -o allow_other
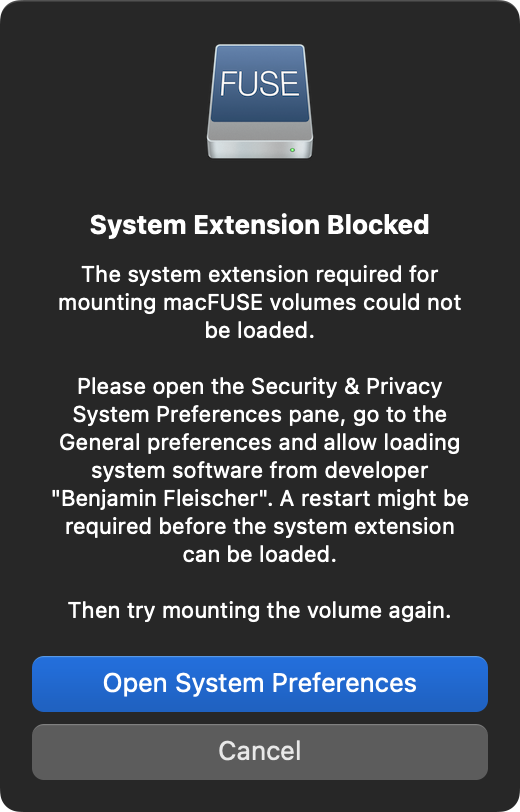
This will pop a couple warnings like "System Extension Blocked":

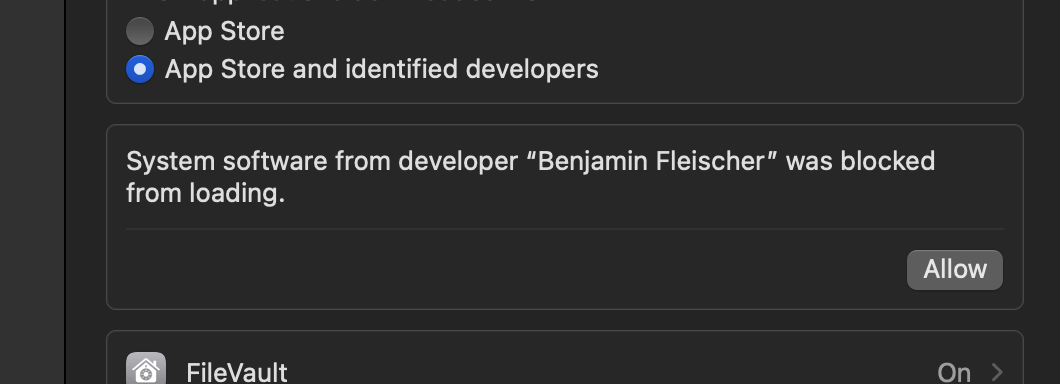
Click 'Open System Preferences', then click 'Allow' where it asks if you want to allow the system extension to run:

This will prompt you to reboot the computer — that now, and once you're back up and running, try mounting the disk again:
sudo ./ext4fuse /dev/disk5s1 ~/ext4_mount -o allow_other
This should work, and you'll see a new disk mounted, like "macFUSE Volume 0 (ext4fuse)". Open that up, and browse around, and you should be able to read the contents of the disk now.
When you're finished, run:
sudo umount ~/ext4_mount
And unmount the disk.
Unfortunately, this doesn't seem to work with every partition I've thrown at it. Sometimes it works, sometimes it shows up as an empty volume... not sure why.
The better option would be to have a separate Linux computer (even a little Raspberry Pi!)—plug the drive in there, then if you need the files on your Mac, create a Samba share and access the files over your network.
Comments
Or just run Linux on the Mac ;)
Heh. I'm guessing you mean Asahi, and that's an option (though a few more steps!); and I used to use VirtualBox to do this in the old days, but as it's not easy to get that working on M1/M2/M3 Apple Silicon Macs, and Docker support for hardware device passthrough doesn't work the same under Docker Desktop for Mac, this is the easiest way short of buying the commercial product :(
There's also an open source project, UTM, which is based on QEMU:
https://mac.getutm.app
I can also recommend UTM for Apple Silicon Macs. It's not nearly as fast as Parallels, but it's more than good enough for what you were trying to do here Jeff. It ran fine on my M1 mini and M1 MBA under Ventura.
AFAICT UTM doesn't allow direct hardware passthrough of USB devices either, at least not on a raw level :(
See: https://docs.getutm.app/guest-support/sharing/usb/
Well, I was able to mount a ZFS backup pool on Debian 12 Arm64 running natively on M2. Good enough for me :)
I would like to believe that page is out of date since I have used my barebones Ubuntu VM to look around EXT4 drives a few times. As long as your vm is running over QEMU, UTM detects off you plug in a new device and asks if you would like to pass it to your vm.
Interesting! I'll have to test it out again.
I just tried it out using UTM and can confirm that it works. When you plugin a USB, UTM detects it, and I am able to read EXT4 from a usb drive that way.
same for me
It works ok-ish for hard drives, but dealing with sd cards with ext4 on them on macos silicon is just pain.
for linux vms you need external sdcard reader (internal is not recognised as usb device), and even then performance is sub-par.
Thanks for the tips, I was going crazy trying to use the SDCard of my Mac Studio :D
Cringe
Linux is a horrible mess. You must be a masochist.
in 2020 I bought a macbook because their prices seemed relatively low compared to the competition, besides I imagined macos as linux with bells and whistles.
The first year of switching from linux to macos was a nightmare.
The way network interfaces were managed, the lack of many basic applications and the quality of those that were already on apple silicon - it was a tragedy.
Even macports and brew did not improve the situation.
Today I use apple mainly because of the integration of ios with macos, and because I spent money on apple-compatible equipment.
I simply became a victim of vendor lock-in.
You just have no clue. Absolutely no clue.
I use Parallels Desktop for it, not only ext4, but also other FS
There’s FUSE-T (fuse-t.org) which doesn’t require a kext or reboot and also works on newer ARM Macs. It creates an NFS server in the background and mounts that using macOS’ native NFS support.
See https://github.com/macos-fuse-t for the different filesystem plugins already made to work with FUSE-T. For others, you usually can just replace “fuse” with “fuse-t” and recompile. Or do some library loading trickery if you only have the binary.
The last time I used osx was around 2010, but whenever I needed to transfer files from or to Linux & osx, I used to just set up a python ftp server on the machine that had the files. Maybe not the best solution, but it worked....
One of the silliest things I've learned is: 7zip can understand EXT4. Not perfectly, but if all you need to do is slurp files out of (or add a few files to) an EXT4 filesystem, you can do that with 7zip, at least on windows.
Unfortunately as well, the macfuse project is running into more and more barriers, what with kexts being slowly removed, Mac-fuse-t looks to be a good alternative -- it behaves just like fuse but exposes an NFS interface, rather than a native filesystem.
Macfuse has never seemed to work for me on my M1 Air, but the macos-fuse-t suggested by other commenters did. I did `brew install macos-fuse-t/homebrew-cask/fuse-t` and `git clone https://github.com/macos-fuse-t/ext4fuse.git && cd "$(basename "$_" .git)"` instead of the first two commands.
Same, M1 Air and the approach from the article (macfuse) didn't help, but the one that you mentioned works, thank you very much for sharing.
You approach works for me, thanks for sharing, although its only read permissions, can't write to the disk :(
a kernel extension-less implementation looked really promising - didn’t work for me on this end though but it’s possibly because I’m on macOS Monterey (the compiler said libfuse-t.dylib was built for 14.0) - I’ll have to try this again in Sonoma when I can. It’s still hard to believe that read-only ext4 support is not built into macOS by now.
Same here, M3 Air (14.4.1) and the approach from the article (macfuse) didn't help, but the one that you mentioned works, thank you very much for sharing!
Also, i needed to reboot twice: the 1st time was for enabling kernal extensions from the Security Policy, the 2nd time was for allowing the app to run ¯\_(ツ)_/¯
This macos-fuse-t solution worked for me on my M4 Mac mini running Sequoia 15.1, too!
As a separate test, I also downloaded Ubuntu 22.04 within UTM and, sure enough, UTM asked if it could take the USB disk connection. I allowed it and it didn't show any files; however, a quick reboot of Ubuntu within UTM asked for permission again and then the files showed up.
Both solutions work 👌👍 Thanks everyone!
Tried these commands. Not sure what I'm doing wrong, but I'm trying to compile using Fuse-T on M4. Every time I try, I get:
cc -I/usr/local/include/fuse -DFUSE_USE_VERSION=26 -std=gnu99 -g3 -Wall -Wextra -DEXT4FUSE_VERSION=\"ext4fuse\" -mmacosx-version-min=10.5 -D_FILE_OFFSET_BITS=64 -c -o fuse-main.o fuse-main.c
fuse-main.c:14:10: fatal error: 'fuse.h' file not found
14 | #include
| ^~~~~~~~
1 error generated.
make: *** [fuse-main.o] Error 1
Any suggestions?
ext4fuse might be open source but unfortunately macfuse is not.
I seem to be running into this issue using ext4fuse: https://github.com/gerard/ext4fuse/issues/58
I just followed these instructions on my macbook air, with a usb flash drive - it worked for reading flawlessly. Didn't test writing.
On my M2 Sonoma I needed to do before `make`:
`export PKG_CONFIG_PATH=/usr/local/lib/pkgconfig`
This particular partition also had permissions issue that needed adding `defer_permissions` option e.g `-o allow_other,defer_permissions`
Thanks, I also needed this option to access the home dir on the mounted drive.
Thanks, I have the permission error. How can write in this partition?
I had to run this as well before running `make`:
`brew install pkg-config`
I also needed `-o allow_other,defer_permissions` as mentioned by another person above when actually mounting.
Finally: I needed to shut down the computer, boot into Options, modify security settings, restart, run the mount command, open security preferences, bypass more warnings, restart again (ugh), mount for a third time, open security settings again, hit 'allow.'
I just want to say thank you for this! Looks like we can't install ext4fuse with homebrew anymore.
You should use '-o allow_other,defer_permissions' on macos version > 15
What you fail to mention here is that what you're being asked to do is drop or lower your security settings that are put in place to stop all sorts of viruses and malware from taking advantage of your machine and you might find this ends up hosing your machine or worse, letting in other types of software that'll steal information or encrypt your disk etc etc.
I would never in a million years do this, even if it means mounting ext4 partitions. It's just not worth it.
It's just reading and writing bits and bytes to a disk partition. This should not require me to modify my system security settings.