tutorial

How to download an MP4 from YouTube, every time

I use yt-dlp to download videos off YouTube quite frequently. I'll use the videos as reference, and I often use it to grab the VOD for one of my livestreams, since there's no simpler way (I'm not going to dig through the bowel's of YouTube's UI to try to download one of my own videos...).

But I also can't handle the default .webm videos in all my video editing tools natively, and transcoding is annoying. So I've settled on the following yt-dlp command to first try to pull a native MP4 version off YouTube, and failing that, transcode to MP4 immediately after downloading:

yt-dlp -S res,ext:mp4:m4a --recode mp4 https://www.youtube.com/watch?v=dQw4w9WgXcQ

And if you weren't aware, yt-dlp does an excellent job pulling video files from other sites as well, should the need arise.

apt_key deprecated in Debian/Ubuntu - how to fix in Ansible

2023 Update: Ansible now has the ansible.builtin.deb822_repository module, which can add keys and repositories in one task. It's a little more complex than the old way, and requires Ansible 2.15 or later. See some common deb822_repository examples here, for example, the Jenkins tasks below can be consolidated (though the structure of the templated vars would need reworking):

- name: Add Jenkins repo using key from URL.
  ansible.builtin.deb822_repository:
    name: jenkins
    types: [deb]
    uris: "https://pkg.jenkins.io/debian-stable"
    components: [binary]
    signed_by: https://pkg.jenkins.io/debian-stable/jenkins.io-2023.key
    state: present
    enabled: true

For many packages, like Elasticsearch, Docker, or Jenkins, you need to install a trusted GPG key on your system before you can install from the official package repository.

Using a reverse-NFS mount to access Docker container's data from macOS

For years, Mac users have dealt with slow filesystem performance for Docker volumes when using Docker for Mac. This is because the virtualized filesystem, which used osxfs for a while and will soon be upgraded to use VirtioFS.

But if you need to do large operations on huge codebases inside a shared directory, even using NFS to share from the Mac into Docker is a lot slower than running a native Docker volume or just using files inside the container's own filesystem.

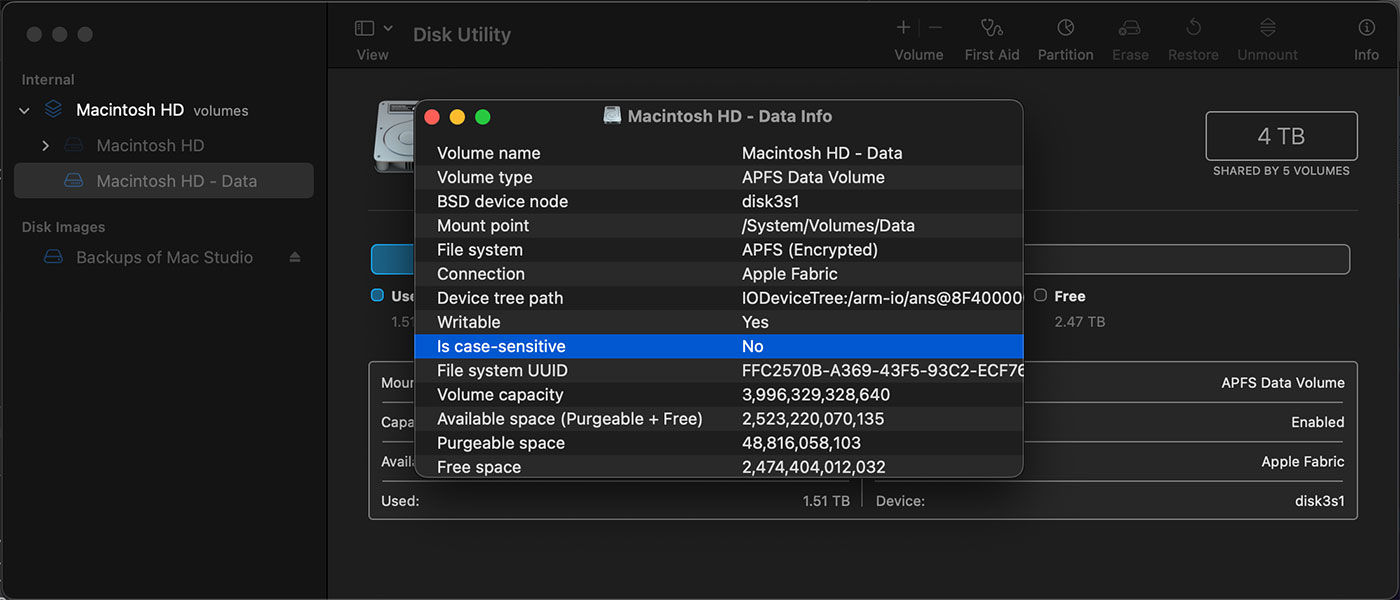
macOS Disk Utility APFS Case Insensitive filesystem

Installing the Asahi Linux Alpha on my M1 Mac mini

After upgrading my main workstation to a Mac Studio, I decided to break tradition.

Usually, I sell off my old workstation to offset the cost of the new one. But just last week, Asahi Linux announced their first alpha release.

Asahi Linux MacBook Pro

If you haven't heard of Asahi, it's a Linux distribution based on Arch Linux that aims to bring a polished Linux experience on Apple Silicon Macs (all the current M1 Macs, and any new Apple Silicon Macs that come in the future).

Playing sounds with Python on a Raspberry Pi

Today I needed to play back an MP3 or WAV file through a USB audio device on a Raspberry Pi, in a Python script. "Should be easy!" I thought!

Clarence the Raspberry Pi Bell Slapper with USB audio output and speaker

Well, a couple hours later I decided to write this blog post to document the easiest way to do it, since I had to take quite a journey to get to the point where sound actually plays through the USB audio output.

The problem is most guides, like this simple one from Raspberry Pi's project site, assume two things:

HTGWA: Use bcache for SSD caching on a Raspberry Pi

This is a simple guide, part of a series I'll call 'How-To Guide Without Ads'. In it, I'm going to document how I set up bcache on a Raspberry Pi, so I could use an SSD as a cache in front of a RAID array.

Getting bcache

bcache is sometimes used on Linux devices to allow a more efficient SSD cache to run in front of a single or multiple slower hard drives—typically in a storage array.

In my case, I have three SATA hard drives: /dev/sda, /dev/sdb, and /dev/sdc. And I have one NVMe SSD: /dev/nvme0n1.

I created a RAID5 array with mdadm for the three hard drives, and had the raid device /dev/md0.

I then installed bcache-tools:

$ sudo apt-get install bcache-tools

And used make-bcache to create the backing and cache devices:

Using Compute Module 4 IO Board pins as an ATX case front panel header

Recently I built the Seaberry, a Raspberry Pi Compute Module 4 mini ITX motherboard into a PC case (video coming soon...), and got the case power button, power LED, and activity LED all wired up to the Pi:

Case power button with LED light

I used the GPIO and 14-pin header present on the Seaberry (which conveniently are identical to the headers on the official CM4 IO Board), and wound up with a fully functionality power button, power LED, and activity LED!

Here's how I did it:

Power activity LEDs and button connections on Raspberry Pi GPIO for CM4 IO Board

Power button

To get the power button working, you need to connect the case's front panel 'power switch' connector to pins 12 and 14 (GLOBAL_EN and GND), as seen in the top middle of the above picture.

HTGWA: Create a ZFS RAIDZ1 zpool on a Raspberry Pi

This is a simple guide, part of a series I'll call 'How-To Guide Without Ads'. In it, I'm going to document how I set up a ZFS zpool in RAIDZ1 in Linux on a Raspberry Pi.

Prequisites

ZFS does not enjoy USB drives, though it can work on them. I wouldn't really recommend ZFS for the Pi 4 model B or other Pi models that can't use native SATA, NVMe, or SAS drives.

For my own testing, I am using a Raspberry Pi Compute Module 4, and there are a variety of PCI Express storage controller cards and carrier boards with integrated storage controllers that make ZFS much happier.

I have also only tested ZFS on 64-bit Raspberry Pi OS, on Compute Modules with 4 or 8 GB of RAM. No guarantees under other configurations.

Installing ZFS

Since ZFS is not bundled with other Debian 'free' software (because of licensing issues), you need to install the kernel headers, then install two ZFS packages:

HTGWA: Create an NFS share in Linux on a Raspberry Pi

This is a simple guide, part of a series I'll call 'How-To Guide Without Ads'. In it, I'm going to document how I create an NFS share in Linux on a Raspberry Pi.

Install NFS

$ sudo apt-get install -y nfs-kernel-server

Create a shared directory

$ sudo mkdir /mnt/mydrive/shared
$ sudo chmod -R 777 /mnt/mydrive/shared

I won't deal with permissions in this post; read this post for more suggestions.

Configure NFS to share that directory

Edit the NFS exports file with sudo nano /etc/exports, and add the following:

/mnt/mydrive/shared *(rw,all_squash,insecure,async,no_subtree_check,anonuid=1000,anongid=1000)

Update the NFS active exports

sudo exportfs -ra

Connect to the share

From another computer, access: nfs://[hostname-or-ip-of-pi]/mnt/mydrive/shared