networking

2.5 Gigabit homelab upgrade - with a PoE+ WiFi 6 AP

For the past year, I've slowly upgraded parts of my network to 10 Gigabit. But 10 Gigabit switches, NICs, and even cabling is a bit more expensive and sometimes annoying to deal with than the very-cheap 1 Gbps equipment most homelabbers are used to.

I dipped my toes into the 2.5 Gbps waters once I got a NAS with 2.5G ports—you can use standard USB NICs that cost less than $50, or PCIe cards for even less. And cabling is easier, since 2.5G works fine over Cat5e (which I already have run to most of my house).

So in order to install a new WiFi 6 Access Point upstairs—and get it's full bandwidth—I upgraded my main 1 Gbps PoE+ switch to a 2.5 Gbps PoE+ switch.

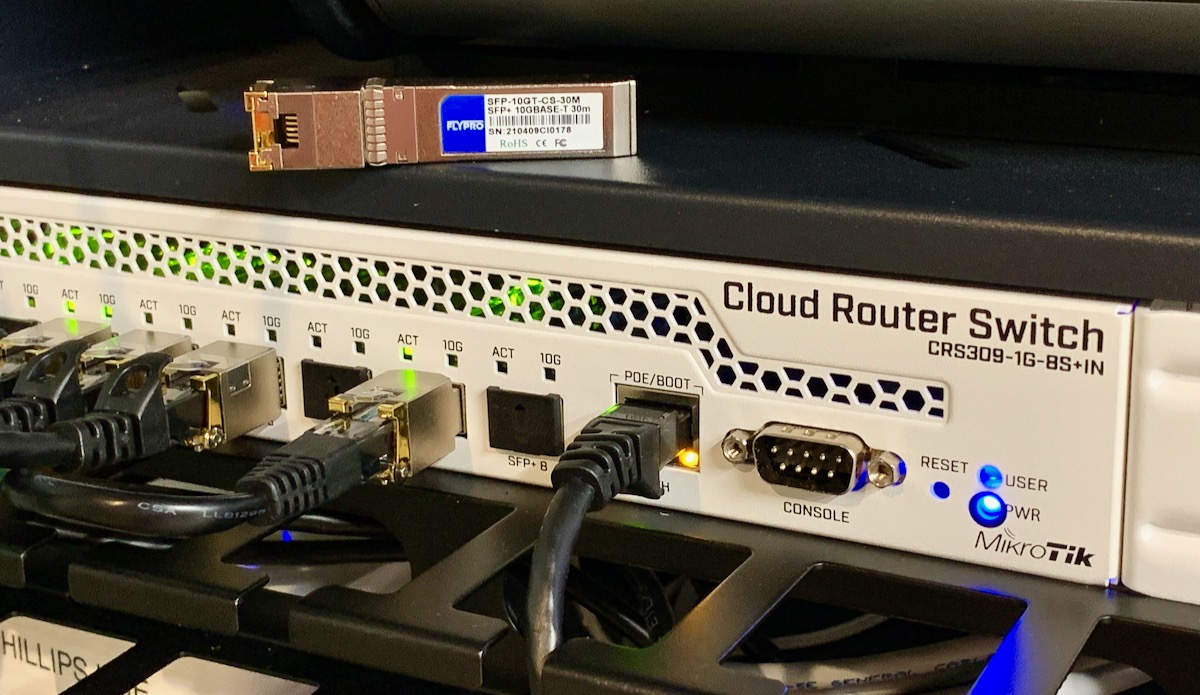
Looking around at options, most switches with more than 4 2.5 Gbps ports with PoE+ seem to cost upwards of $300. And knowing that I'd like to expand my network a bit in the future, I finally splurged a bit and bought this 20-port monstrosity:
Using 4G LTE wireless modems on a Raspberry Pi

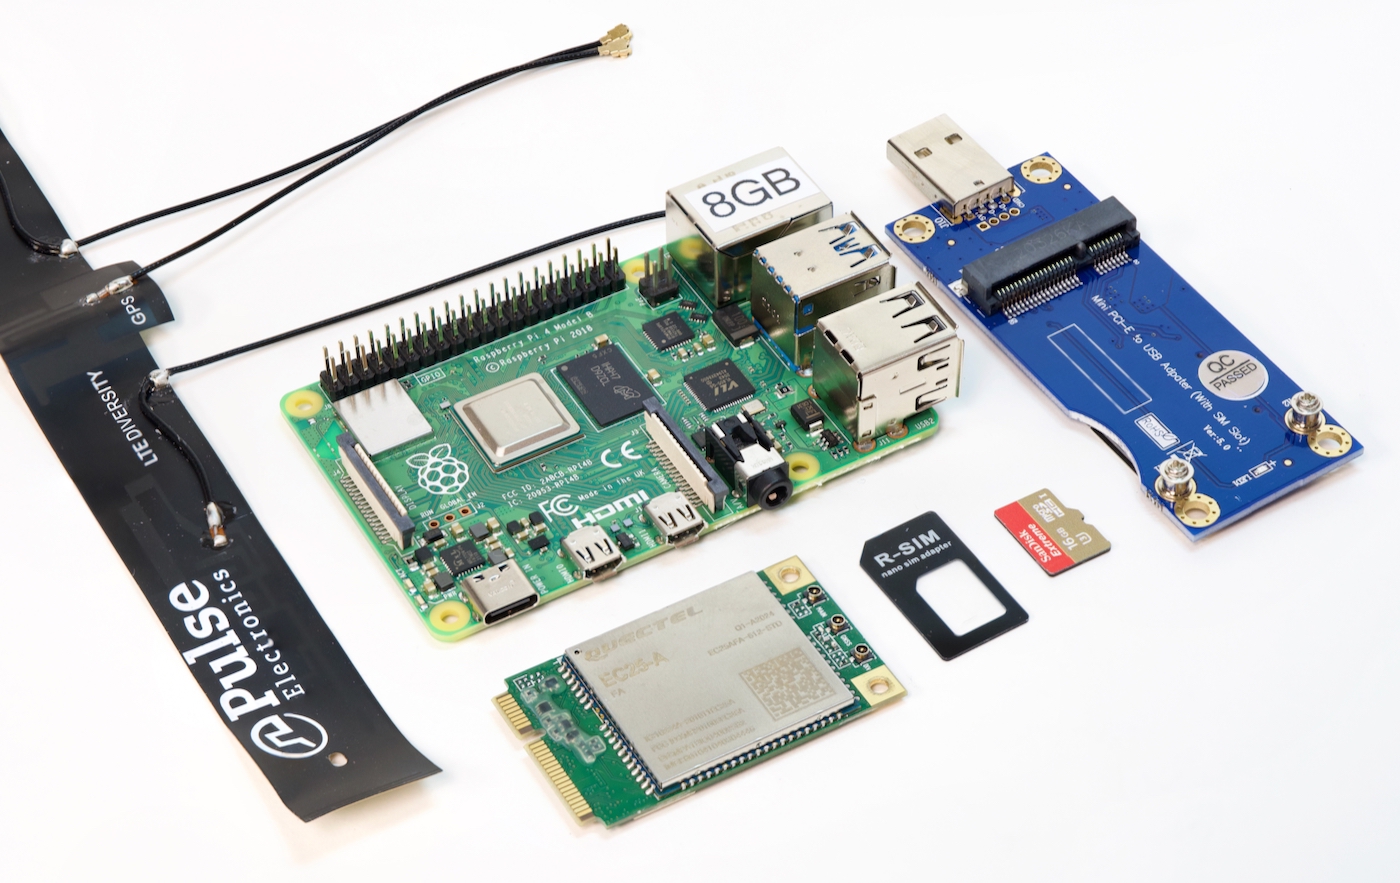
For a recent project, I needed to add cellular connectivity to a Raspberry Pi (actually, an entire cluster... but that's a story for a future time!).

Raspberry Pi 4 model B with 4G LTE wireless Quectel modem and antenna and USB adapter

I figured I'd document the process in this blog post so people who follow in my footsteps don't need to spend quite as much time researching. This post is the culmination of 40+ hours of reading, testing, and head-scratching.

There doesn't seem to be any good central resource for "4G LTE and Linux" out there, just a thousand posts about the ABC's of getting an Internet connection working through a 4G modem—but with precious little explanation about why or how it works. (Or why someone should care about random terms like PPP, ECM, QMI, or MBIM, or why someone would choose qmi_wwan over cdc_ether, or ... I could go on).

Hopefully you can learn something from my notes. Or point out places where I'm glaringly wrong :)

Network interface routing priority on a Raspberry Pi

52Pi Raspberry Pi Compute Module 4 Router Board

As I start using Raspberry Pis for more and more network routing activities—especially as the Compute Module 4 routers based on Debian, OpenWRT, and VyOS have started appearing—I've been struggling with one particular problem: how can I set routing priorities for network interfaces?

Now, this is a bit of a loaded question. You could dive right into routing tables and start adding and deleting routes from the kernel. You could mess with subnets, modify firewalls, and futz with iptables.

But in my case, my need was simple: I wanted to test the speed of a specific interface, either from one computer to another, or over the Internet (e.g. via speedtest-cli).

The problem is, even if you try limiting an application to a specific IP address (each network interface has its own), the Linux kernel will choose whatever network route it deems the best.

Quick 'Hello World' HTTP deployment for testing K3s and Traefik

Recently I needed to test the full HTTP stack between a Kubernetes cluster's member nodes and an external Internet routing setup, and so I wanted to quickly install K3s (which includes Traefik by default, and load balances through ports 80 and 443 on all nodes), then get a quick 'hello world' web page up, so I could see if the traffic was routing properly all the way from the external host through to a running container exposed via Traefik Ingress.

Here's how I set up a basic 'Hello World' web page on my K3s cluster:

First, I created an HTML file to be stored as a ConfigMap. Create a file named index.html with the following contents:

<html>
<head>
  <title>Hello World!</title>
</head>
<body>Hello World!</body>
</html>

Create a ConfigMap with the HTML from the file you just created:

$ kubectl create configmap hello-world --from-file index.html

Save the following to Kubernetes resource definitions into a file named hello-world.yml:

Raspberry Pi holds its own against low-cost ARM NAS

Earlier this year, I pitted the $549 ASUSTOR Lockerstor 4 NAS against a homebrew $350 Raspberry Pi CM4 NAS, and came to the (rather obvious) conclusion that the Lockerstor was better in almost every regard.

Jeff Geerling holding Raspberry Pi Radxa Taco NAS board and ASUSTOR Drivestor 4 Pro

Well, ASUSTOR introduced a new lower-cost NAS, the $329 Drivestor 4 Pro (model AS3304T—pictured above), and sent me one to review against the Raspberry Pi, since it make for a better matchup—both have 4-core ARM CPUs and a more limited PCI Express Gen 2 bus at their heart.

Around the same time, Radxa also sent me their new Taco—a less-than-$100 Raspberry Pi Compute Module 4 carrier board with 5x SATA ports, 1 Gbps and 2.5 Gbps Ethernet, an M.2 NVMe slot, and an M.2 A+E key slot. (The Taco will soon be available as part of a kit with a CM4 and case for around $200.)

The specs evenly matched, at least on paper:

Working with multiple WiFi interfaces on a Raspberry Pi

Sometimes I like to connect to multiple WiFi networks on my Pi for... reasons.

Other times I like being able to use a better wireless interface than the built-in WiFi module on the Pi 4 or CM4, but don't want to add dtoverlay=disable-wifi in my /boot/config.txt and reboot.

Since Pi OS uses wpa_supplicant, it's actually easy to do this.

First, see what interfaces you have available, e.g. with ip a:

$ ip a
...
3: wlan0: <BROADCAST,MULTICAST> mtu 1500 qdisc pfifo_fast state DOWN group default qlen 1000
    link/ether e4:5f:01:4e:f0:22 brd ff:ff:ff:ff:ff:ff
4: wlan1: <NO-CARRIER,BROADCAST,MULTICAST,UP> mtu 1500 qdisc noqueue state DOWN group default qlen 1000
    link/ether 84:5c:f3:f6:e9:29 brd ff:ff:ff:ff:ff:ff

If you want to specify a network configuration that only applies to wlan1, create a file named /etc/wpa_supplicant/wpa_supplicant-wlan1.conf, and put your network credentials inside:

HTGWA: Create an NFS share in Linux on a Raspberry Pi

This is a simple guide, part of a series I'll call 'How-To Guide Without Ads'. In it, I'm going to document how I create an NFS share in Linux on a Raspberry Pi.

Install NFS

$ sudo apt-get install -y nfs-kernel-server

Create a shared directory

$ sudo mkdir /mnt/mydrive/shared
$ sudo chmod -R 777 /mnt/mydrive/shared

I won't deal with permissions in this post; read this post for more suggestions.

Configure NFS to share that directory

Edit the NFS exports file with sudo nano /etc/exports, and add the following:

/mnt/mydrive/shared *(rw,all_squash,insecure,async,no_subtree_check,anonuid=1000,anongid=1000)

Update the NFS active exports

sudo exportfs -ra

Connect to the share

From another computer, access: nfs://[hostname-or-ip-of-pi]/mnt/mydrive/shared

Time Card and PTP on a Raspberry Pi Compute Module 4

Ahmad Byagowi, the project lead for Open Compute Project's Time Appliance, reached out to me a couple weeks ago and asked if I'd be willing to test the new Time Card Facebook had announced in mid-August on a Raspberry Pi Compute Module 4. Since I have a sort of obsession with plugging anything and everything into a Pi to see what works and what doesn't, I took him up on the offer.

The official specs had PCI Express Gen 3 on a x4 slot as a requirement, but it seems the Gen 3 designation is a little loose—the card and its driver should work fine on an older Gen 2 bus—like the one the Raspberry Pi Compute Module 4 exposes if you use the official IO Board:

Raspberry Pi Compute Module 4 IO Board PCI Express Slot

The slot is x1, but you can plug in any width card using an adapter like this one or by hacking an open end into it with a razor saw or dremel tool.

Getting faster 10 Gbps Ethernet on the Raspberry Pi

If you read the title of this blog post and are thinking, "10 Gbps on a Pi? You're nuts!," well, check out my video on using the ASUS XG-C100C 10G NIC on the Raspberry Pi CM4. Back? Good.

To be clear: it's impossible to route 10 gigabits of total network throughput through any Raspberry Pi on the market today.

ASUS 10G NIC in Raspberry Pi Compute Module 4 IO Board

But it is possible to connect to a 10 gigabit network at 10GBase-T speeds using a Raspberry Pi Compute Module 4 and an appropriate PCI Express 10G NIC. And on my Pi PCI Express site, I documented exactly how I got an ASUS XG-C100C working on the Raspberry Pi. All it takes is a quick recompile of the kernel, and away it goes!