Posts in this series:
- Part 1: Intro to Apache Solr
- Part 2: Solr and Drupal, A History
- Part 3: Testing Solr locally
In earlier Solr for Drupal Developers posts, you learned about Apache Solr and it's history in and integration with Drupal. In this post, I'm going to walk you through a quick guide to getting Apache Solr running on your local workstation so you can test it out with a Drupal site you're working on.
The guide below is for those using Mac or Linux workstations, but if you're using Windows (or even if you run Mac or Linux), you can use Drupal VM instead, which optionally installs Apache Solr alongside Drupal.
As an aside, I am writing this series of blog posts from the perspective of a Drupal developer who has worked with large-scale, highly customized Solr search for Mercy (example), and with a variety of small-to-medium sites who are using Hosted Apache Solr, a service I've been running as part of Midwestern Mac since early 2011.
Installing Apache Solr in a Virtual Machine
Apache Solr can be run directly from any computer that has Java 1.7 or later, so technically you could run it on any modern Mac, Windows, or Linux workstation natively. But to keep your local workstation cleaner, and to save time and hassle (especially if you don't want to kludge your computer with a Java runtime!), this guide will show you how to set up an Apache Solr virtual machine using Vagrant, VirtualBox, and Ansible.
Let's get started:
- Clone the ansible-vagrant-examples project from GitHub (you can also download ansible-vagrant-examples directly).
- Change directory in Terminal to the
/solrsubdirectory, and follow the instructions in the Solr example's README for installing Vagrant, VirtualBox, and Ansible, then follow the rest of the instructions for building that example (e.g.vagrant up). - At this point, if you visit
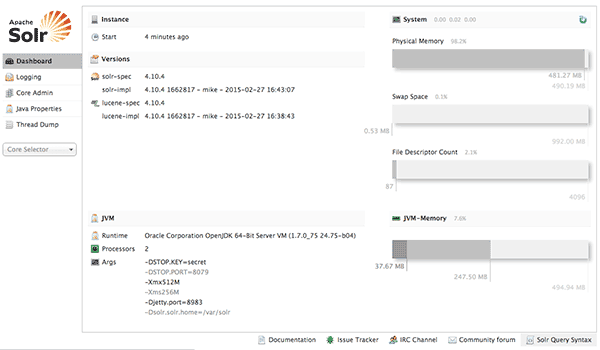
http://192.168.33.44:8983/solrin your browser, you should see the Apache Solr admin interface:

- The next step is to point your local Drupal installation (assuming you have a Drupal site running locally) at this Solr instance and make sure it can connect. We're using the Apache Solr Search module in this example, but Search API Solr Search setup is similar.
- Visit
/admin/config/search/apachesolr/settings, and click 'Add search environment'. - Enter
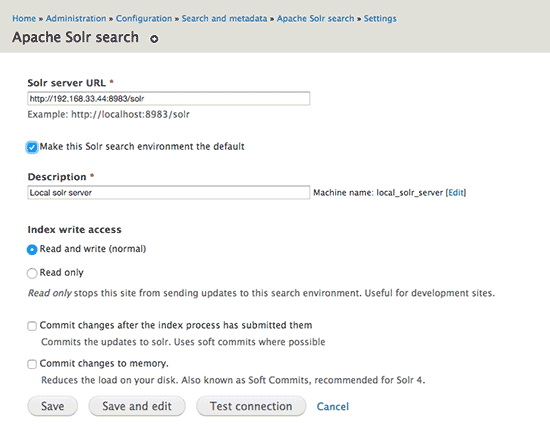
http://192.168.33.44:8983/solr/collection1(this is the default search core that Apache Solr includes out of the box) for 'Solr server URL', check the checkbox to make this the default environment, add a description (e.g. 'Local Solr server'), and click 'Save':

- After saving the new environment, the next page should show the environment with a green-colored background. That means your Drupal site can connect to the Solr server.
- Visit
- After Drupal is able to connect, you need to add the Drupal module's Solr configuration files to the search core you'll be using. This takes a few steps, but will ensure all your Drupal content is indexed by Solr correctly.
- Change directory in Terminal to the
/solrdirectory (where you ranvagrant upearlier), and runvagrant sshto log into the Solr VM. - While logged into the VM, enter the following commands:
-
curl http://ftp.drupal.org/files/projects/apachesolr-7.x-1.x-dev.tar.gz | tar -xz(download the Apache Solr module into the current directory). -
sudo cp -r apachesolr/solr-conf/solr-4.x/* /var/solr/collection1/conf/(copy the Apache Solr module configuration into the default Solr core). -
sudo chown -R solr:solr /var/solr/collection1/conf/*(fix permissions for the copied files). -
sudo service solr restart(restart Apache Solr so the configuration is updated).
-
- Once this is complete, go back to the Apache Solr search settings page (
/admin/config/search/apachesolr/settings), and click on the 'Index' configuration in your local solr server row. You should see something likedrupal-4.3-solr-4.xfor the 'Schema', meaning the Drupal moduleschema.xmlhas been picked up successfully.
- Change directory in Terminal to the
At this point, you should be able to index your site content into Apache Solr (scroll down and check some content types you want to index), and start playing around with Apache Solr search!
The best first steps are to look around in all the Apache Solr configuration pages, test indexing your entire site, then work on setting up search pages and maybe even install the Facet API module to configure some search facets. In very little time, you should be able to make your site search as user-friendly and speedy as Amazon, Newegg, etc.
Further Reading
- Drupal.org has excellent step-by-step documentation for installing and configuring a Solr server on many different platforms (assuming you don't want to use the
geerlingguy.solrAnsible role to set up Solr for you on Redhat, CentOS, Ubuntu or Debian!). - Drupal.org also has Tips and suggestions for module customization.
- Check out Nick Veenhof's excellent presentation, Intro to search in Drupal 7, on Slideshare.