windows

Qualcomm cancels Snapdragon Dev Kit, refunds all orders

Snapdragon Developer Kit for Windows

This afternoon I received the following email from Arrow, regarding the Snapdragon Developer Kit for Windows:

Dear Valued Customer,

Please see this important message from Qualcomm:

”At Qualcomm, we are dedicated to pioneering leading technology and delivering premium experiences to our valued customers. The launch of 30+ Snapdragon X-series powered PC's is a testament to our ability to deliver leading technology and the PC industry's desire to move to our next-generation technology. However, the Developer Kit product comprehensively has not met our usual standards of excellence and so we are reaching out to let you know that unfortunately we have made the decision to pause this product and the support of it, indefinitely.

Snapdragon Dev Kit for Windows - the fastest X Elite, tested

Snapdragon Dev Kit for Windows - Snapdragon X Elite

Update - October 17: Today Qualcomm cancelled all remaining orders, and will no longer support the Dev Kit.

I have mixed feelings publishing this post: many developers who are actively trying to port their Windows software to Arm are still awaiting shipment of their own Snapdragon Dev Kits, and I seem to be one of the first few people to receive one.

Everyone I've been in contact with also ordered the Dev Kit on July 16, but we've all been waiting for it to ship—for months.

Qualcomm Snapdragon Dev Kit for Windows Teardown (2024)

Update - October 17: Today Qualcomm cancelled all remaining orders, and will no longer support the Dev Kit.

In late July, a week after ordering the Snapdragon Dev Kit, I wondered where it was. Arrow's website said 'Ships tomorrow' when I ordered, after all.

Many developers eager to test their code on Windows on Arm, on the premiere new 'CoPilot+' PCs that would revolutionize computing as we know it, were also wondering.

Snapdragon Dev Kit - teardown complete

Where is Qualcomm's Snapdragon X Elite Dev Kit?

Update - September 26: Today my Dev Kit finally arrived! And of course, the first thing I did was tear it down—check out my teardown photos of the Snapdragon Dev Kit internals here.

Update 2 - October 17: Today Qualcomm cancelled all remaining orders, and will no longer support the Dev Kit.

I signed up to buy a Qualcomm Snapdragon X Dev Kit the second I found out about it. It's supposed to be the Mac mini killer for Windows.

Snapdragon X Elite Dev Kit Transparent

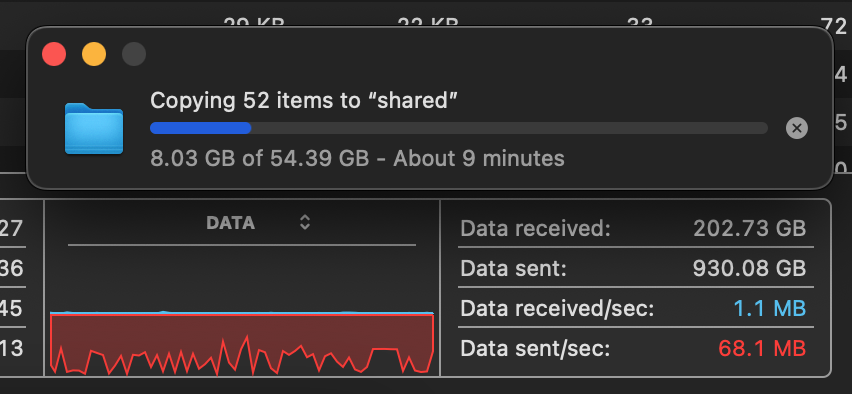
macOS Finder is still bad at network file copies

In what is becoming a kind of hobby for me, I've just finished testing another tiny NAS—more on that tomorrow.

But as I was testing, I started getting frustrated with the fact I've never been able to get a Raspberry Pi—regardless of internal storage speeds, even with 800+ MB/sec PCIe-based storage—to consistently write more than around 100 MB/sec write speeds over the network, with either Samba or NFS.

NFS would be more consistent... but it ran around 82 MB/sec:

NFS file copy to Raspberry Pi 5 stalled at 80 MB per second

Samba would peak around 115 MB/sec, but it was wildly inconsistent, averaging around 70 MB/sec:

Samba file copy to Raspberry Pi 5 wild undulations

I have a problem: I use macOS1.

Testing 10 GbE throughput on Windows - iperf3 is outdated

iperf3 only showing 4.5 gbps in Windows

Recently I upgraded my AMD-based PC on a livestream, and I installed an Innodisk EGPL-T101 10 Gbps M.2 NIC (link to Innodisk product page).

Under Linux, I could get through 9.4 Gbps using iperf3 between the PC and my Mac Studio. But under Windows, I could only get up to about 4.5 Gbps (tested around 1h 27m into the stream)!

Ampere Altra Max - Windows, GPUs, and Gaming

Ampere Altra Developer Platform Workstation

I'm testing Adlink's Ampere Altra Developer Platform. This machine has a 96-core Arm CPU, but now they sell a 128-core version. Apple also recently released the M2 Ultra Mac Pro, so the model I'm testing isn't the "fastest in the world" like I could boast a couple months ago... but it's close, and I actually doubled my performance from last time—I'll show how later.

Testing Microsoft's Windows Dev Kit 2023

Last week Microsoft started selling their $599 Windows Dev Kit 2023, formerly known as 'Project Volterra'.

Microsoft Windows Developer Kit 2023 ARM Desktop - Project Volterra

I got my hands on one after a little bit of a shipping delay, and promptly started tearing it down to see what's inside. You can click here to browse the entire Twitter thread where I posted pictures of the box contents and teardown, or view it below:

Making sure symlinks work on CIFS/SMB mounted shares

I was recently working on some backup scripts to make sure I could clone all my GitHub repositories to my NAS, which I have mounted to a Raspberry Pi that handles all my backups.

I'm using gickup to run through all my GitHub repos and clone them locally, and I configured it to clone each repo directly into my NAS share, which is mounted over CIFS using something like:

sudo mount -t cifs -o uid=pi,username=myuser,password=mypass //my-nas-server/Backups /Volumes/Backups

Most repositories cloned correctly, but a few had symlinks inside, and when git was cloning them, the process would error out with:

HTGWA: Create a Samba (SMB) share on a Raspberry Pi

This is a simple guide, part of a series I'll call 'How-To Guide Without Ads'. In it, I'm going to document how I create Samba (SMB) shares in Linux on a Raspberry Pi.

Install Samba

This is important, for obvious reasons:

$ sudo apt install -y samba samba-common-bin

Create a shared directory

$ sudo mkdir /mnt/mydrive/shared
$ sudo chmod -R 777 /mnt/mydrive/shared

I won't deal with permissions in this post; read the Samba docs for that.

Configure Samba to share that directory

Edit the Samba config file with sudo nano /etc/samba/smb.conf, and add the following:

[shared]
path=/mnt/mydrive/shared
writeable=Yes
create mask=0777
directory mask=0777
public=no

Restart Samba so the new shared directory is available:

$ sudo systemctl restart smbd

Create a password for Samba access

The user must already exist on the system; in this example, I'll use the default pi user: