mac

M4 Mac mini's efficiency is incredible

I had to pause some of my work getting a current-gen AMD graphics card running on the Pi 5 and testing a 192-core AmpereOne server to quickly post on the M4's efficiency.

M4 Mac mini on desk

I expected M4 to be better than M1/M2 (I haven't personally tested M3), and I hoped it would at least match the previous total-system-power efficiency king, a tiny arm SBC with an RK3588 SoC... but I didn't expect it to jump forward 32%. Efficiency gains on the Arm systems I test typically look like 2-5% year over year.

The M4 mini I just bought reaches 6.74 Gflops/W on the HPL benchmark.

UPDATE 2024-11-20: I re-ran all my tests without my 10 Gbps Ethernet plugged in, and the efficiency is even better. I also re-tested LLM performance, and made this quick video:

Import unsupported camera RAW files into Apple Photos

Many years ago, I decided to migrate my photo library from Apple's now-defunct Aperture to Photos, so I could take advantage of Apple's iCloud Photo Library (don't worry, I still have three full complete local backups, plus a separate cloud backup besides Apple's iCloud originals).

One pain point is RAW support. As camera manufacturers add new models, their proprietary RAW codecs are updated, and software vendors like Apple, Adobe, and Microsoft have to update photo editing tools to work with the new camera models.

I don't envy them this task, but as Photos was Apple's official successor to Aperture (a pale shadow to be sure, but it has its merits as a semi-decent library organizer), they've generally done well supporting new camera models. The compatibility list for macOS Sonoma, iPadOS 17, and iOS 17 is a testament to that effort.

macOS Finder is still bad at network file copies

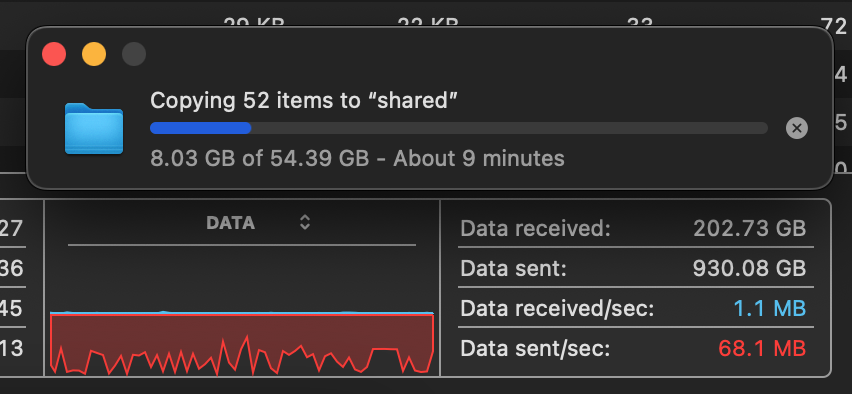
In what is becoming a kind of hobby for me, I've just finished testing another tiny NAS—more on that tomorrow.

But as I was testing, I started getting frustrated with the fact I've never been able to get a Raspberry Pi—regardless of internal storage speeds, even with 800+ MB/sec PCIe-based storage—to consistently write more than around 100 MB/sec write speeds over the network, with either Samba or NFS.

NFS would be more consistent... but it ran around 82 MB/sec:

NFS file copy to Raspberry Pi 5 stalled at 80 MB per second

Samba would peak around 115 MB/sec, but it was wildly inconsistent, averaging around 70 MB/sec:

Samba file copy to Raspberry Pi 5 wild undulations

I have a problem: I use macOS1.

Getting files to and from a PowerBook 3400c with hfsutils

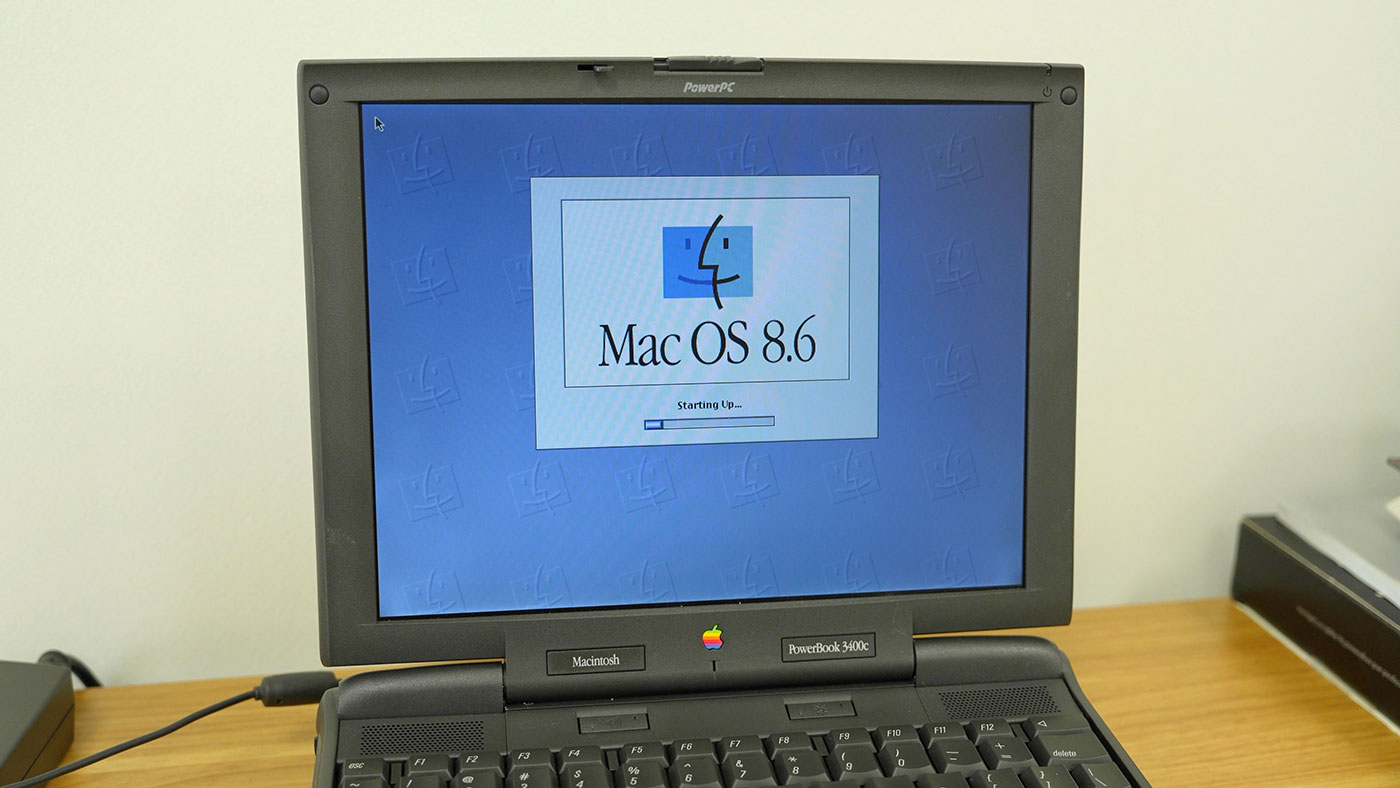
PowerBook 3400c booting Mac OS 8.6

There are about a dozen ways to get files to and from an older Mac like my PowerBook 3400c, but right now (at least until I figure out a good way to get my NAS -> an AppleTalk server -> 3400c working), my preferred method is via a CF card—I pop the CF card into a CF-to-PCMCIA adapter, then insert that into one of my PowerBook 3400's PC card slots, and bingo: removable flash storage on a 1990s laptop!

I still have a few CF cards kicking around (I used them with my old Nikon D700 camera), and you can buy a 4GB SanDisk Ultra CF card new from Amazon still—albeit for the price of $35... Sometimes the smaller/older cards work better with old Macs, and most of the files I deal with are well under a few MB anyways.

Resizing macOS app windows for 16:9 screen capture

I frequently need to capture a window of some Mac app for a recording (usually for my YouTube channel), and I've used a little AppleScript I wrote years ago for the purpose.

Somehow, that script (which I saved as a 'one shot' App (.app extension) that just runs then quits) got deleted off my Script Editor folder in my iCloud Drive, so I had to re-create it.

Luckily, the syntax for this operation is dead simple:

tell application "Safari"
    set bounds of front window to {0, 50, 1280, 770}
end tell

You can adjust the {X, Y, width, height} parameters accordingly—note that the width and height seem to be additive to the X/Y. So I use 770 instead of 720 for the height (720 + 50).

In Script Editor, save the file as a .app, with the option to keep it running unchecked. Now, whenever you want a window sized perfectly for capture, just press Command + Spacebar, then type in the name of the Script/App you saved, and hit enter. The top-most window in Safari will scale to exactly 720p resolution.
Transcribing recorded audio and video to text using Whisper AI on a Mac

2024 Update: I have a short video outlining my end-to-end process for subtitling all my videos on YouTube using Whisper/MacWhisper:

.embed-container { position: relative; padding-bottom: 56.25%; height: 0; overflow: hidden; max-width: 100%; } .embed-container iframe, .embed-container object, .embed-container embed { position: absolute; top: 0; left: 0; width: 100%; height: 100%; }

Late last year, OpenAI announced Whisper, a new speech-to-text language model that is extremely accurate in translating many spoken languages into text. The whisper repository contains instructions for installation and use.

tl;dr:

Batch transcode a folder of videos with Handbrake's CLI

I've used Handbrake for years, to transcode practically any video file—including ripped DVDs and Blu-Rays—so I can watch the videos on practically any device. It's especially helpful for .mkv files, which can have a hodgepodge of video formats inside, and are notoriously difficult to play back, especially on older or more locked down playback devices.

But Handbrake's achilles heel, as a GUI-first application, is in a lack of easy batch operation. You can queue videos up one at a time, which is nice, but more recently, as I've ripped more TV seasons onto my NAS, I've wanted to transcode 5, 10, or 20 files at a time.

Enter HandBrakeCLI. Assuming you're on a Mac and installed Handbrake already (e.g. with brew install --cask handbrake), download HandBrakeCLI, mount the downloaded disk image, and copy the executable into a system path:

sudo cp /Volumes/HandBrakeCLI-1.5.1/HandBrakeCLI /usr/local/bin/

Then you can use it to loop over an entire directory—even recursively—and transcode all the video files within.

Two Macs in my Rack: Mac Studio rackmount review

No stranger to rack-mounting Macs that were never meant for the task, I reached out to MyElectronics to see if they had a rackmount solution for the Mac Studio when I bought mine in March.

They said they were already working on a Mac Studio Rack Mount system, and they'd gladly send me one to review, since they knew how much I loved rackmounting my M1 Mac mini and all the Raspberry Pis I run in my homelab.

MyElectronics Mac Studio rackmount with M1 Mac mini

How to transcribe audio to text using Dictation on a Mac

You can use the Dictation feature built into your Mac to transcribe audio files, and in my experience, it's been about 98-99% accurate, so it saves a lot of time if you want to index your audio files, or you need a transcript for some other purpose.

These instructions were last updated for macOS Monterey 12.4.

First, open up System Preferences, go to Keyboard, then the 'Dictation' tab:

Apple Dictation System Preferences

Turn on Dictation, and when prompted, accept the terms for Apple's Dictation service. Also take note of the 'Shortcut' (e.g. 'press dictation key' or 'press control twice'. You'll use that to activate dictation later.

How I rip DVDs and Blu-Rays into my Mac (2022 Edition)

It's been more than a decade since I wrote Ripping Movies from Blu-Ray, HD-DVD and DVD, Getting them onto Apple TV, iPad, iPhone, etc.. Heck, back then I didn't write everything as a 'blog post'—that was labeled as an 'article' :P

In a surprising twist of fate, we went from a somewhat more centralized online media situation back then (basically, Netflix) to a hellscape of dozens of streaming services today. And in many cases, older movies can only be found as used and/or pirated DVDs on eBay!

Thus, I'm writing a fresh guide to how I rip DVDs and Blu-Ray discs into my Mac, then transcode them with Handbrake. Heck, some people who are deeper into the r/datahoarder rabbit hole even have dedicated transcoding servers so they can generate optimal archival copies in 4K, 1080p, etc. akin to how YouTube and other online platforms set up their files!

But for me, the basic process goes: