Orion O6 ITX Arm V9 board - temper your expectations
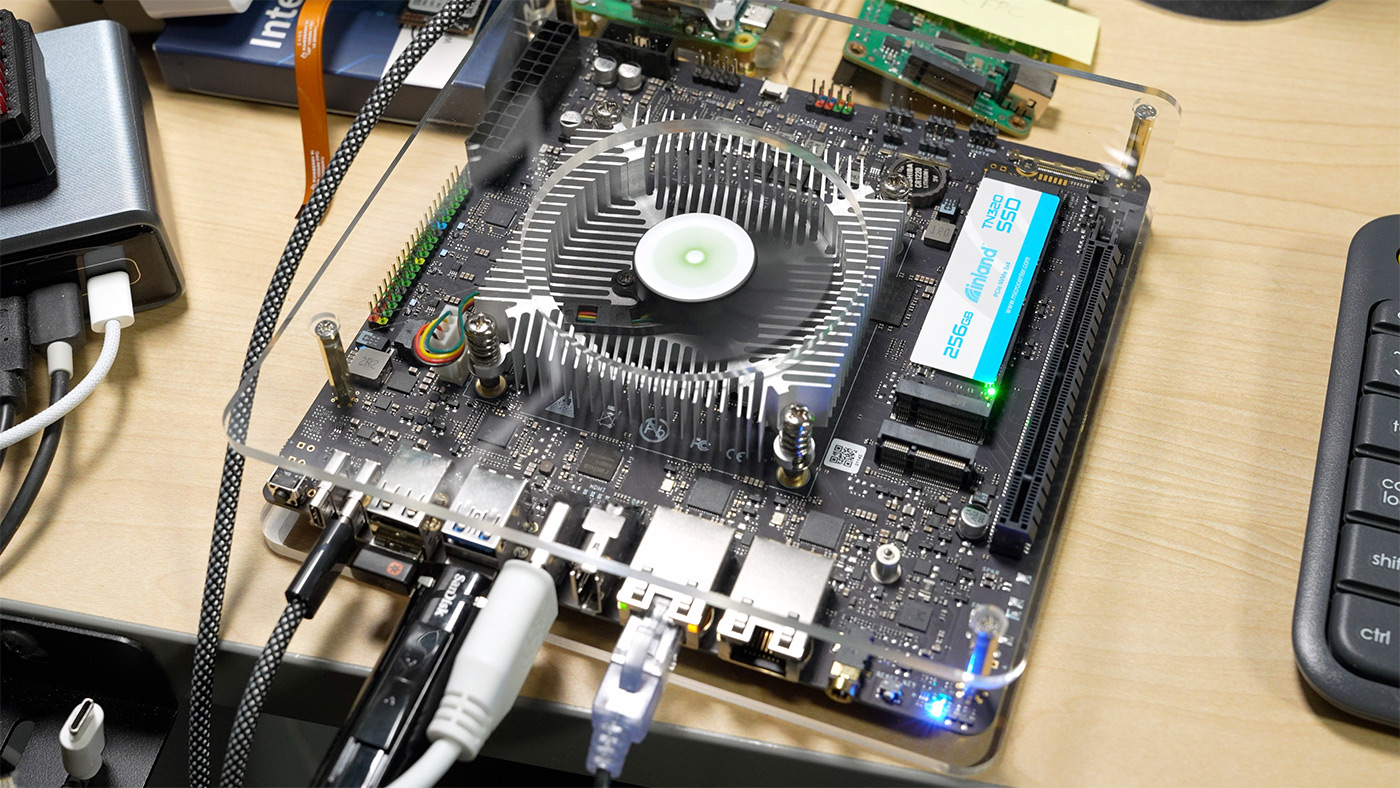
When I first heard about Radxa's Orion O6, it was being compared to Apple's M1 silicon, and the product page has extraordinary claims:
When I first heard about Radxa's Orion O6, it was being compared to Apple's M1 silicon, and the product page has extraordinary claims:
As I briefly mentioned yesterday, someone mentioned in this blog's comments a successful M.2 socket installation on the empty header on the Pi 500 (something I attempted, rather poorly!). With a few added components, and 3.3V supplied to a pad on the bottom via a bench power supply, the M.2 slot works just fine, allowing the use of NVMe SSDs or other PCIe devices.

Indeed, this person emailed me further proof, along with notes for anyone wishing to follow in their footsteps.
First, solder on four minuscule capacitors (rating may be gleaned off the CM5 IO Board schematics, I think?) on the PCIe lines heading to the NVMe slot. These are incredibly small, so a good microscope and decent SMD soldering skills are pretty necessary.

If anyone asks why I prefer to work with Raspberry Pis when I want to tinker on a random project, consider:
I just spent the past hour with a brand new ArmSoM Sige7 board (see my debugging notes in my sbc-reviews repo). This SBC has been on the market for months, with glowing reviews all the way back in May...
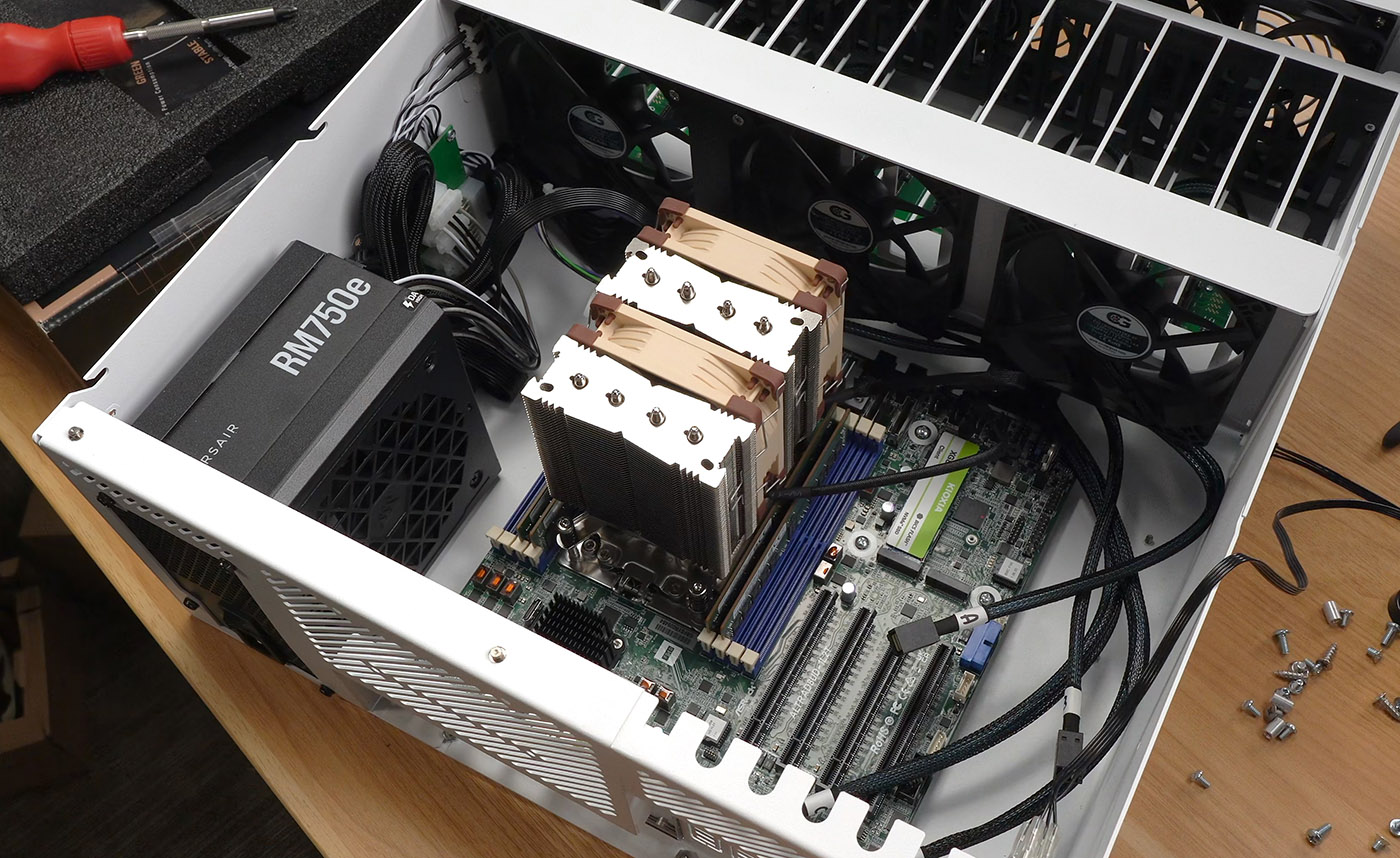
It's not cheap, but it's efficient. At least, that's my hope.
Over the past few months, I worked with a number of vendors to assemble what I hope will make an efficient but high-performance arm64 NAS. In the video embedded below, I've put together the following (some of these links are affiliate links):
Every so often, when you're debugging weird hardware issues on SBCs like the Raspberry Pi, it's useful to get way down into the guts of how the Pi represents its hardware to Linux.
And the Linux kernel uses a method called Device Tree overlays to do it. On the Pi 5 (and other Pis), these overlays are stored as .dtb files inside the /boot/firmware directory, and there's an overlay for every major Raspberry Pi hardware model.
I've had to modify the dtb files in the past to increase the PCIe BAR space for early GPU testing on the Compute Module 4. And recently I've had to mess with how the PCIe address space is set up for testing certain devices on the Raspberry Pi 5.
Every few months, I try to test a number of new Raspberry Pi Compute Module 4-based projects, and at this point I've looked at over 100 boards that use the CM4 to fill some need—general computing, industrial controls, media playback, or even clustered computing!
This month, among other projects, I spent a bit of time with Zymbit's Secure Edge Node D35:

It's risky business fighting Intel, AMD, and Arm, and that's exactly what Star Five is trying to do with this:

The chip on this new single board computer could be the start of a computing revolution—at least that's what some people think!
The VisionFive 2 has a JH7110 SoC on it, sporting a new Instruction Set Architecture (ISA) called RISC-V.
The original Raspberry Pi Camera model v1.3 came from the factory set to ∞ (infinity) focus, so when you used it out of the box for something like a landscape timelapse rig, or for security or monitoring purposes (where the Pi is at least 5 meters away from the subjects it's recording), everything would look crisp and sharp.
For many fixed-focus cameras and lower-end camera sensors, it makes sense to set them to infinity focus; closer objects are still recognizable, but slightly blurry. Most of these cameras don't need to focus on a person a meter away for a portrait, and they're also rarely used for FaceTime-like video chat.

I'm no stranger to experimenting with my workspace; since I work from a computer for at least 8 hours a day, I try to find ways to prevent RSI and joint pain. I've tried most everything—from über-expensive fancy mesh desk chairs to ergonomic keyboards and vertical mice. But nothing has made as large (and quick) a difference as working from a standing desk.
 Most of the time, I'm extremely happy with Apple's decision to make all their physical media (CD/DVD) drives slot-loading, as it means there's one less part to accidentally break off my Mac, and it just looks so darn pretty! But every now and then, I have a hellish experience with the drive. This usually happens when:
That's the hardware side. Sometimes, I just want to get a dratted disc out of the computer, but dragging it to the trash, or pressing the 'Eject' key won't work. Often a dialog pops up and says "the disc is in use" (but it doesn't specify what application is using it!), or worse, there is no error—the disc just won't come out.
Here are the steps I usually take in trying to eject a CD or DVD—in order from least likely to damage the disc and/or my Mac, to most likely... always try the steps in order!