cm4

Building a desktop Pi PC with Axzez's Interceptor

A couple months ago, Axzez reached out and asked if I'd like to test out the Interceptor—an ATX-style mini motherboard for the Raspberry Pi Compute Module 4, complete with 5 SATA ports.

Axzez Interceptor Carrier Board for Compute Module 4

The board is meant to be used as an NVR (Network Video Recorder): You pop a Raspberry Pi Compute Module 4 on top, you plug in up to 5 SATA hard drives for storage, and then you plug IP cameras into the 3 extra LAN ports (via an RTL8367RB switch) on the back, and you can store IP camera footage on the drives, and access it over the network.

How to update the Raspberry Pi Compute Module 4 Bootloader / EEPROM

The Raspberry Pi 4 and Pi 400 share the same Broadcom BCM2711 SoC with the Compute Module 4. All three devices also share an SPI EEPROM flash chip, which stores the Raspberry Pi's bootloader.

SPI EEPROM Flash bootloader chip on Raspberry Pi 4 model B

But the Compute Module 4 differs in how you update the bootloader. With the Pi 4 or Pi 400, you can use Raspberry Pi imager to write a utility image to a microSD card to update the bootloader. You put in the card, power on the Pi, and the bootloader is updated.

On the Compute Module 4, because it may be used in remote or embedded environments, its bootloader can actually be hardware write-protected!

Enable the external antenna connector on the Raspberry Pi Compute Module 4/5

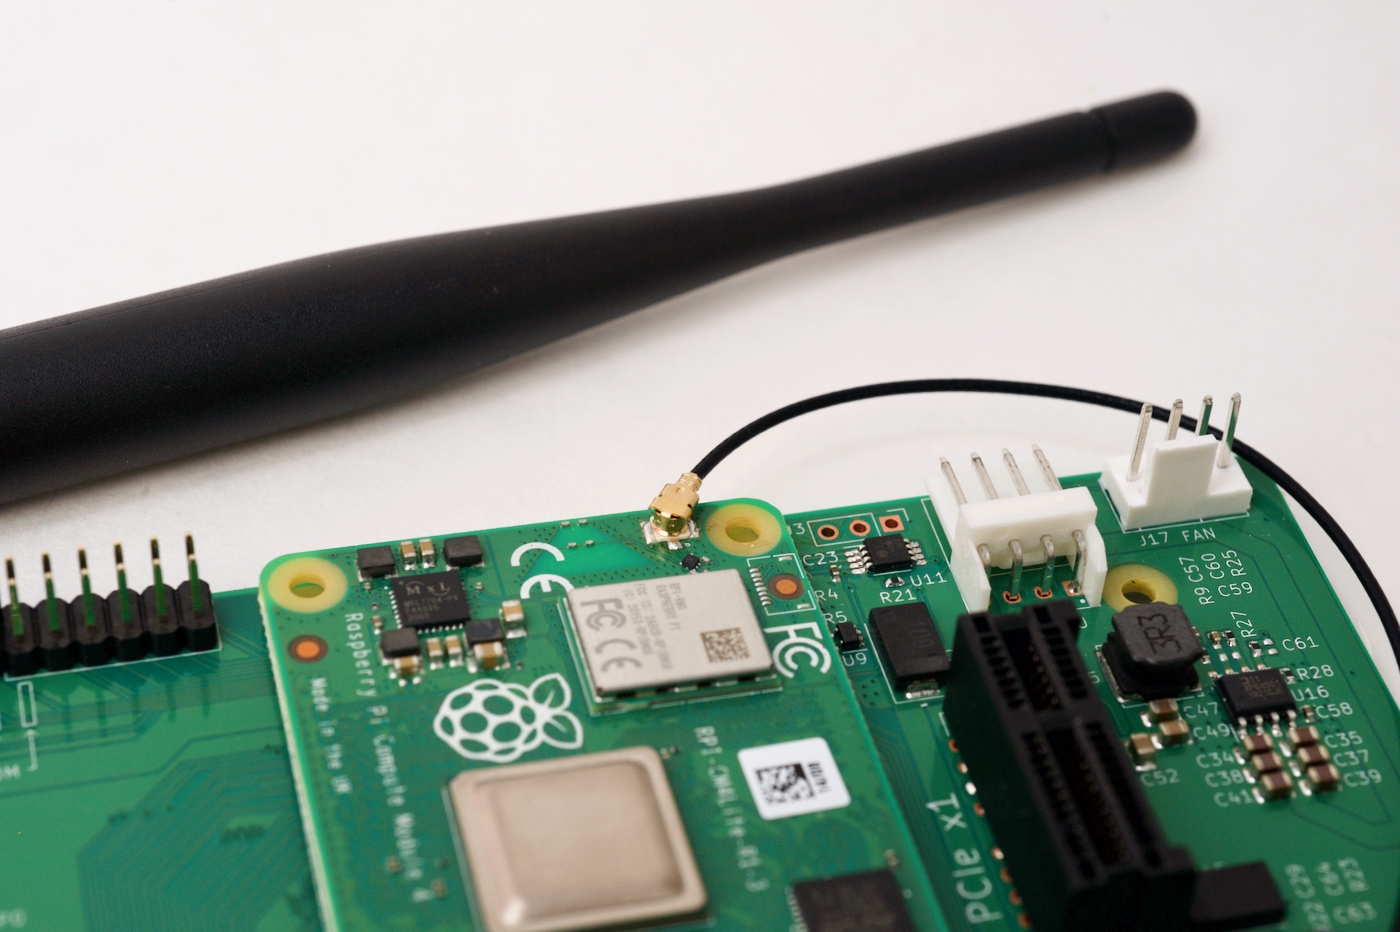
Raspberry Pi Compute Module 4 external U.FL antenna

The internal WiFi module on the Compute Module 4 (that's the bit under the metal shield in the picture above) routes its antenna signal via software. You can route the signal to either:

  1. The built-in PCB triangle antenna (this is the default).
  2. The external U.FL connector (which has an external antenna plugged into it in the picture above)

To switch the signal to the U.FL connector (for example, if you're installing your CM4 in a metal box where the PCB antenna would be useless), you need to edit the boot config file (sudo nano /boot/firmware/config.txt, and add the following at the bottom:

# Switch to external antenna.
dtparam=ant2

Then reboot the Pi.

It's dire: Raspberry Pi availability tracker is launched

Yesterday André Costa emailed me about his new website, rpilocator.

rpilocator website screenshot as of Jan 31 2022

It's a website to track Raspberry Pi 4 model B, Compute Module 4, Pi Zero 2 W, and Pico availability across multiple retailers in different countries.

In his own words:

This database was created out of frustration trying to locate a Raspberry Pi product in the height of the chip and supply chain shortages of 2021. I got tired of visiting multiple websites every day trying to figure out if there were any Raspberry Pi's in stock. I coded this website in a few days during my spare time and had it hosted on a Raspberry Pi for a couple of weeks before deciding to make it publicly available. This is not hosted on a Raspberry Pi anymore.

Raspberry Pi holds its own against low-cost ARM NAS

Earlier this year, I pitted the $549 ASUSTOR Lockerstor 4 NAS against a homebrew $350 Raspberry Pi CM4 NAS, and came to the (rather obvious) conclusion that the Lockerstor was better in almost every regard.

Jeff Geerling holding Raspberry Pi Radxa Taco NAS board and ASUSTOR Drivestor 4 Pro

Well, ASUSTOR introduced a new lower-cost NAS, the $329 Drivestor 4 Pro (model AS3304T—pictured above), and sent me one to review against the Raspberry Pi, since it make for a better matchup—both have 4-core ARM CPUs and a more limited PCI Express Gen 2 bus at their heart.

Around the same time, Radxa also sent me their new Taco—a less-than-$100 Raspberry Pi Compute Module 4 carrier board with 5x SATA ports, 1 Gbps and 2.5 Gbps Ethernet, an M.2 NVMe slot, and an M.2 A+E key slot. (The Taco will soon be available as part of a kit with a CM4 and case for around $200.)

The specs evenly matched, at least on paper:

Pine64 and Radxa's new Pi CM4-compatible boards

Since the Raspberry Pi was introduced, hundreds of clones have adopted the Pi's form factor (from the diminutive Zero to the 'full size' model B). Often they have better hardware specs, and yet they remain a more obscure also-ran in that generation of Single Board Computer (SBC).

Pine64 SOQuartz and Radxa CM3 in front of Raspberry Pi Compute Module 4

So when I saw Radxa's CM3 and Pine64's SOQuartz, I wanted to see if either would be—as they advertised—'drop in, pin-compatible replacements' for the Raspberry Pi Compute Module 4.

tl;dr: They're not. At least not yet.

Hardware and Specs

Both boards are technically pin-compatible. And both will boot and run (to some extent) on pre-existing Compute Module 4 carrier boards, including Raspberry Pi's official IO Board:

Controlling PWM fans with the Raspberry Pi CM4 IO Board's EMC2301

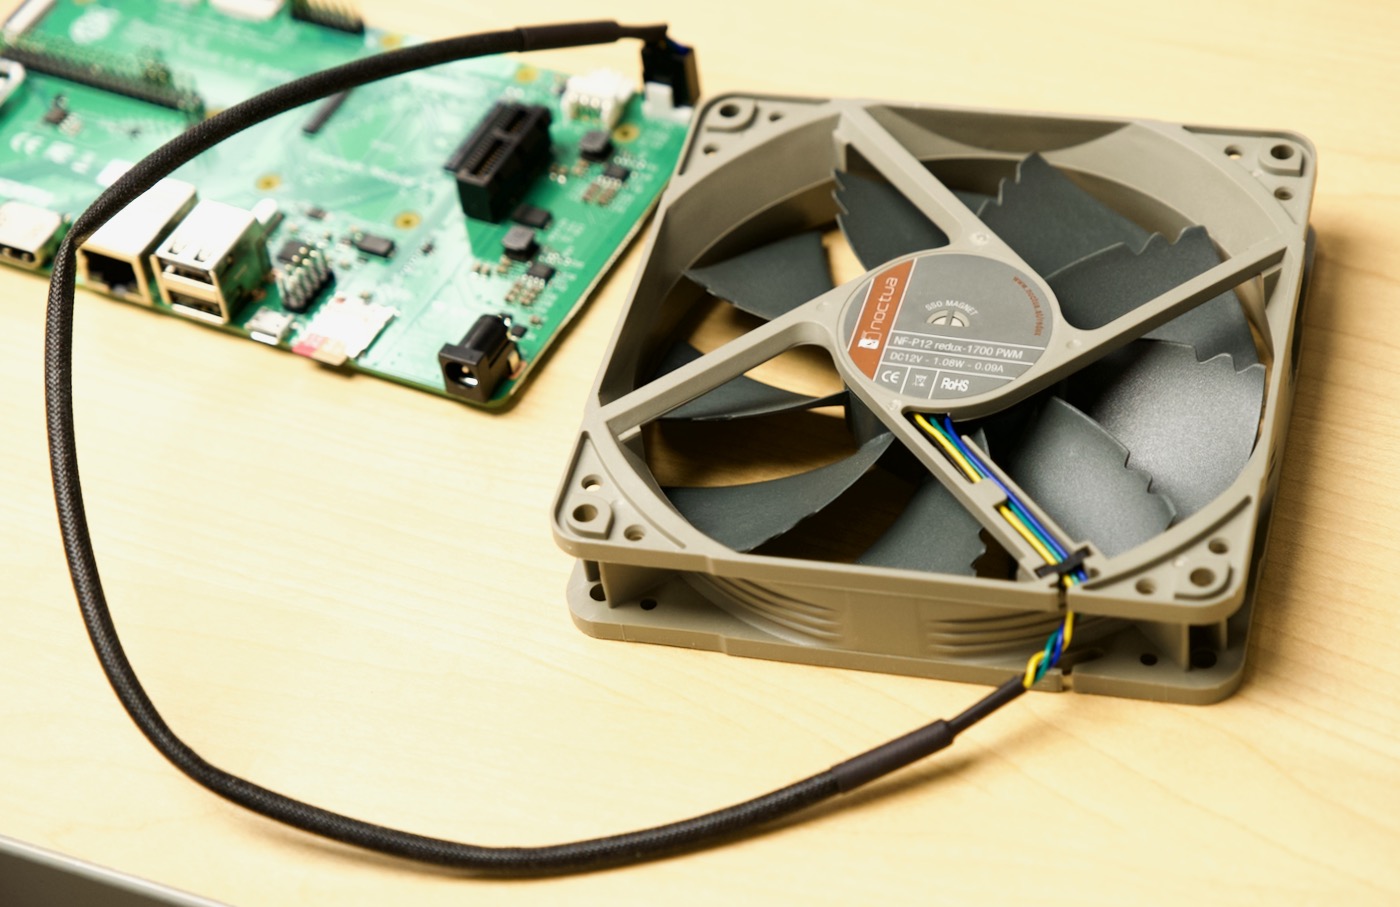
Noctua 120mm PWM fan connected to Raspberry Pi CM4 IO Board

When I initially reviewed the Compute Module 4 IO Board, I briefly mentioned there's a 4-pin fan connector. It's connected to the Pi's I2C bus using a little PWM chip, the EMC2301.

But wait... what's I2C, what's PWM, and what's so special about a 4-pin fan connector? I'm glad you asked—this post will answer that and show you how you can control a fan connected to the IO Board, like the quiet Noctua NF-P12 pictured above with my IO Board.

If you plug a fan like that into the CM4 IO Board, it will start running full blast, 24x7. If you need that much cooling, that's great, but a lot of times, I don't mind my Pi's CPU getting warmer if it means I can run the fan silent most of the time.

Kubesail's PiBox mini 2 - 16 TB of SSD storage on a Pi

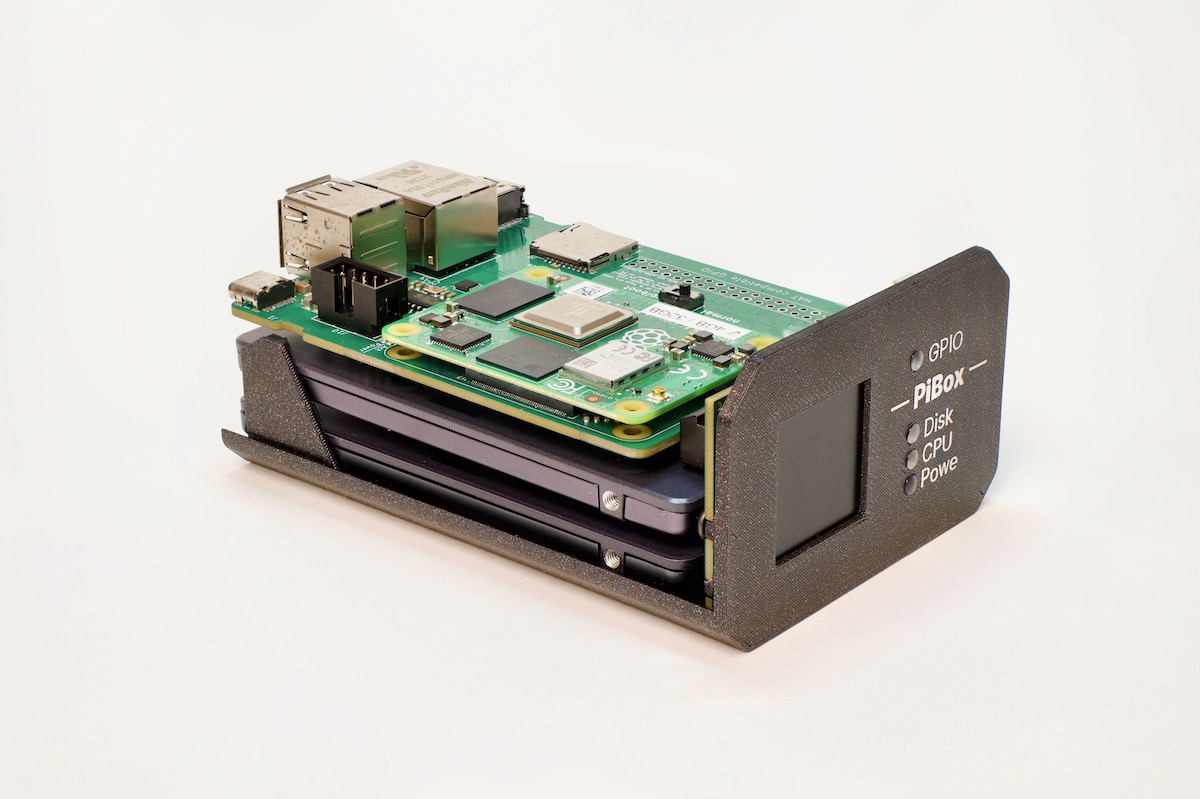
Kubesail Raspberry PiBox mini 2 front side exposed

Many months ago, when I was first testing different SATA cards on the Raspberry Pi Compute Module 4, I started hearing from GitHub user PastuDan about his experiences testing a few different SATA interface chips on the CM4.

As it turns out, he was working on the design for the PiBox mini 2, a small two-drive NAS unit powered by a Compute Module 4 with 2 native SATA ports (providing data and power), 1 Gbps Ethernet, HDMI, USB 2, and a front-panel LCD for information display.

The Hardware

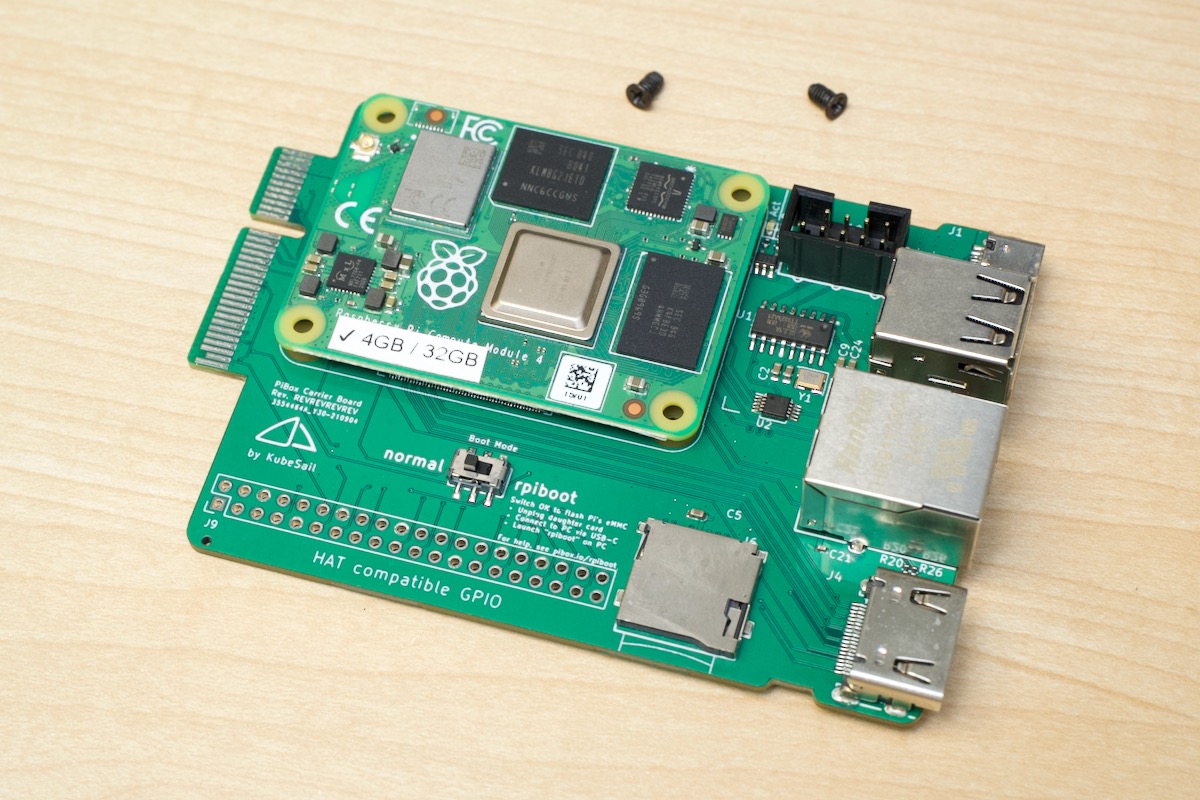
The PiBox mini 2 is powered by the Compute Module 4 on this interesting carrier board:

PiBox mini carrier board with Raspberry Pi Compute Module 4

Face detection for my leaf blower

In the class of 'out there' projects, I recently added a little AI to my leaf blower:

Leaf blower with Raspberry Pi on top for AI ML Machine Vision blasting

The short of it: I have a face detection algorithm running which, when a certain individual enters the field of the Pi's vision, triggers a servo that powers on the blower, releasing a powerful air blast.

Red Shirt Jeff gets blasted by air cannon

I've been wanting to play around with face detection on the Pi for some time, but the Pi Zero I use in most of my camera projects is seriously underpowered for this kind of work.

CM4Ext Nano

So when Harlab (Hardware Laboratory) told me they'd like to send me a CM4Ext Nano board for testing, I thought it'd be the perfect opportunity to play with machine vision on the Pi.