terminal

Batch transcode a folder of videos with Handbrake's CLI

I've used Handbrake for years, to transcode practically any video file—including ripped DVDs and Blu-Rays—so I can watch the videos on practically any device. It's especially helpful for .mkv files, which can have a hodgepodge of video formats inside, and are notoriously difficult to play back, especially on older or more locked down playback devices.

But Handbrake's achilles heel, as a GUI-first application, is in a lack of easy batch operation. You can queue videos up one at a time, which is nice, but more recently, as I've ripped more TV seasons onto my NAS, I've wanted to transcode 5, 10, or 20 files at a time.

Enter HandBrakeCLI. Assuming you're on a Mac and installed Handbrake already (e.g. with brew install --cask handbrake), download HandBrakeCLI, mount the downloaded disk image, and copy the executable into a system path:

sudo cp /Volumes/HandBrakeCLI-1.5.1/HandBrakeCLI /usr/local/bin/

Then you can use it to loop over an entire directory—even recursively—and transcode all the video files within.
An easier way to find an ASUSTOR NAS to set it up

I have a few ASUSTOR NASes at my house, and I don't like installing a custom application just to identify the NAS so I can visit it's web UI the first time.

The official ASUSTOR getting started guide recommends installing ASUSTOR Control Center, which does a good job of identifying ASUSTOR devices on your network. And that's about it.

But behind the scenes, it's likely just scanning your network and matching any MAC addresses in Asustek's range. Which is easy to do without a third party app.

In my case, I can just run the following nmap command in the terminal and it spits out a list of all ASUS/ASUSTOR devices on my network:

Z shell or Bash command alias to open two tabs to specified directories in macOS Terminal

There are a few projects I have where I need to work from two separate directories simultaneously, and while there are a number of ways I could set up workspaces in various esoteric IDEs or terminal session managers, I am stodgy in my ways and enjoy using the built-in Terminal in macOS for most things. If you use iTerm on the Mac, the commands are similar, but the AppleScript events that I use may need to be adjusted.

But I'm getting ahead of myself. For these projects, I want to have a bash/zsh alias that does the following:

  1. When I type xyz (alias) and hit 'return'
  2. Open the current tab to path ~/projects/xyz
  3. Open a new tab next to this tab
  4. Change directories in then new tab to path ~/something-else/xyz

Simple enough, you say, but I found that a number of AppleScript incantations (e.g. do script and the like) could not be made to work with bash aliases easily. In the end, I put the following in my .zshrc file (see all of geerlingguy's dotfiles here—some private aliases excluded):

Git 2.20.1 is super slow on macOS Mojave on my work Mac

Update: I just upgraded my personal mac to 2.20.1, and am experiencing none of the slowdown I had on my work Mac. So something else is afoot. Maybe some of the 'spyware-ish' software that's installed on the work mark is making calls like lstat() super slow? Looks like I might be profiling some things on that machine anyways :)

I regularly use Homebrew to switch to more recent versions of CLI utilities and other packages I use in my day-to-day software and infrastructure development. In the past, it was necessary to use Homebrew to get a much newer version of Git than was available at the time on macOS. But as Apple's evolved macOS, they've done a pretty good job of keeping the system versions relatively up-to-date, and unless you need bleeding edge features, the version of Git that's installed on macOS Mojave (2.17.x) is probably adequate for now.

But back to Homebrew—recently I ran brew upgrade to upgrade a bunch of packages, and it happened to upgrade Git to 2.20.1.

Use Ansible's YAML callback plugin for a better CLI experience

Ansible is a great tool for automating IT workflows, and I use it to manage hundreds of servers and cloud services on a daily basis. One of my small annoyances with Ansible, though, is its default CLI output—whenever there's a command that fails, or a command or task that succeeds and dumps a bunch of output to the CLI, the default visible output is not very human-friendly.

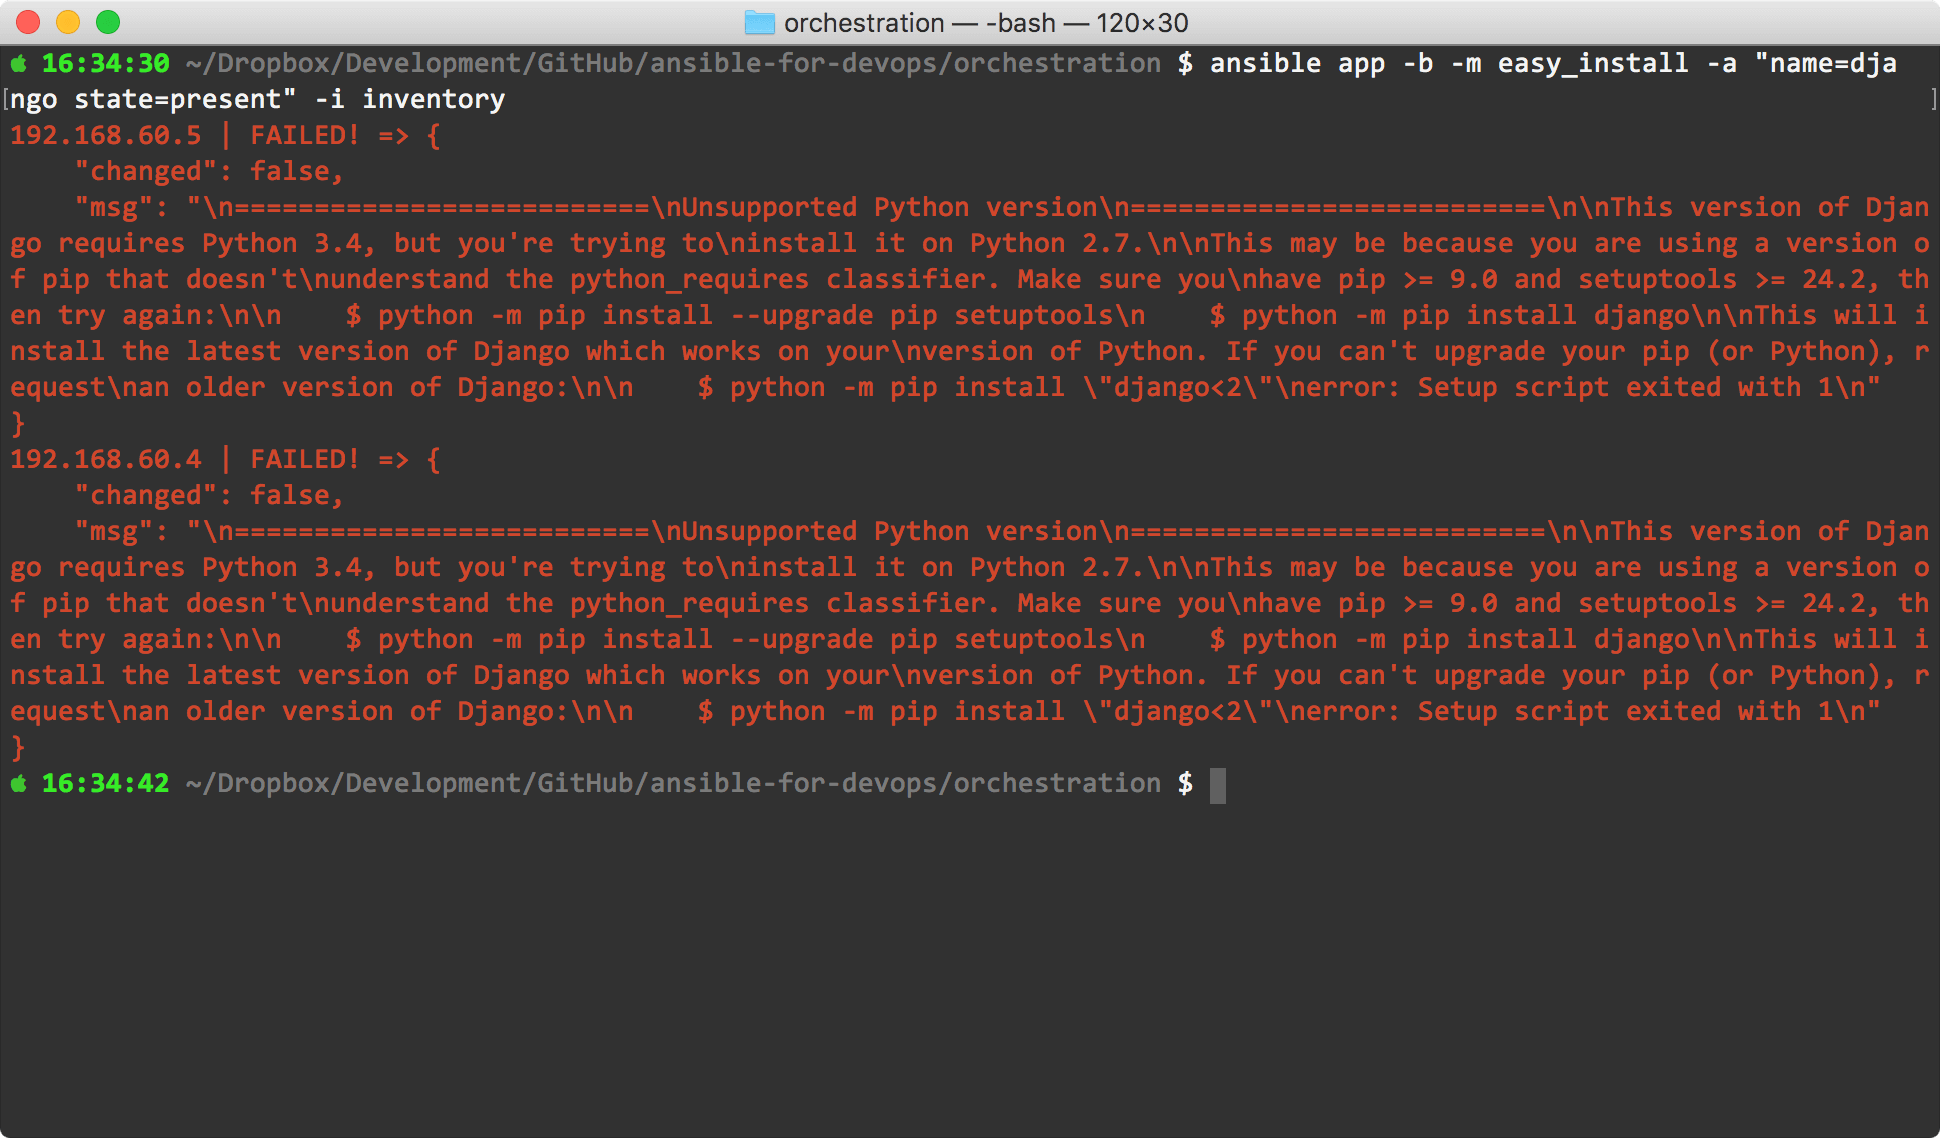
For example, in a Django installation example from chapter 3 of my book Ansible for DevOps, there's an ad-hoc command to install Django on a number of CentOS app servers using Ansible's yum module. Here's how it looks in the terminal when you run that task the first time, using Ansible's default display options, and there's a failure:

Ansible 2.5 default callback plugin

...it's not quickly digestible—and this is one of the shorter error messages I've seen!

Fix for Ansible hanging when used with Docker and TTY

For almost all my Ansible roles on Ansible Galaxy, I have a comprehensive suite of tests that run against all supported OSes on Travis CI, and the only way that's possible is using Docker containers (one container for each OS/test combination).

For the past year or so, I've been struggling with some of the test suites having strange issues when I use docker exec --tty (which passes through Ansible's pretty coloration) along with Ansible playbooks running inside Docker containers in Travis CI. It seems that certain services, when restarted on OSes running sysvinit (like Ubuntu 14.04 and CentOS 6), cause ansible-playbook to hang indefinitely, resulting in a build failure:

Raspberry Pi Zero W as a headless time-lapse camera

tl;dr: There are many ways to capture time-lapse videos. But this one is cheap, completely wireless, and mine. If you want to skip the post and go straight for the glory, grab a copy of my Time-lapse app for the Raspberry Pi.

Time-lapses transform subtle, slow processes into something beautiful, and often make us think about things in new ways. For example, have you ever thought about just how heavy a wet snow is? The trees in your yard might know a thing or two about that! Check out a time-lapse I recorded this morning some mighty oak tree branches, as they relaxed upward as if in relief from the wet snow falling off:

Figuring out why an external USB hard drive won't spin down on my Mac

I am using a 2011 Mac mini as a backup server for all the data I store on iCloud, and for the first few days while I was setting up the Mac, I noticed the 4 TB and 2 TB external USB drives I had plugged in would spin down after a few minutes, and I would have blissful silence as long as there wasn't an active operation on that Mac (which should be fairly rare; just hourly Time Machine backups and periodic SSD activity since the iCloud libraries are all on SSD).

However, after a few weeks, I noticed that at least one of the two hard drives runs continuously, 24x7. Something on the Mac mini must keep hitting the drive and preventing it from spinning down.

To see what was happening, I used sudo fs_usage | grep VOLUME (in my case, VOLUME is 4\ TB\ Utility) to monitor what processes were accessing the drive, and what files they were accessing. After a few minutes watching (and doing nothing else on the computer, to make sure I wasn't causing any extra filesystem seeks), there were a couple regular culprits:

Remove ALL your local Vagrant Boxes via this bash command

Assuming you have only one box per provider, this command will delete ALL Vagrant boxes you currently have on your system:

$ vagrant box list | cut -f 1 -d ' ' | xargs -L 1 vagrant box remove -f

This command does the following:

  1. vagrant box list: Prints out a list of all installed vagrant boxes (with two columns—box name or path, and meta info)
  2. cut -f 1 -d ' ': Cuts the list and takes out just the first column (using spaces to delimit the columns)
  3. xargs -L 1 vagrant box remove -f: Use xargs to run one command per line, running the command vagrant box remove -f [box name from list/cut].

You can use xargs' -t option to output the commands being run just before they're executed. And if you have multiple boxes per provider, or if you have multiple versions of the same box, you'll likely need to modify the command a bit.

How to edit and navigate chunks of a giant text file on Mac/Linux

For most log and text files, simply opening them up in $editor_of_your_choice works fine. If the file is less than a few hundred megabytes, most modern editors (and even some IDEs) shouldn't choke on them too badly.

But what if you have a 1, 2, or 10 GB logfile or giant text file you need to search through? Finding a line with a bit of text is simple enough (and not too slow) if you're using grep. But if you want to grab a chunk of the file and edit that chunk, or split the file into smaller files, there's a simple process that I use, based on this Stack Overflow answer: