cli

Fixing nginx Error: Undefined constant PDO::MYSQL_ATTR_USE_BUFFERED_QUERY

I install a lot of Drupal sites day to day, especially when I'm doing dev work.

In the course of doing that, sometimes I'll be working on infrastructure—whether that's an Ansible playbook to configure a Docker container, or testing something on a fresh server or VM.

In any case, I run into the following error every so often in my Nginx error.log:

"php-fpm" nginx Error: Undefined constant PDO::MYSQL_ATTR_USE_BUFFERED_QUERY

The funny thing is, I don't have that error when I'm running CLI commands, like vendor/bin/drush, and can even install and manage the Drupal site and database on the CLI.

The problem, in my case, was that I had applied php-fpm configs using Ansible, but in my playbook I hadn't restarted php-fpm (in my case, on Ubuntu 22.04, php8.3-fpm) after doing so. So FPM was running with outdated config and didn't know that the MySQL/MariaDB drivers were even present on the system.
Batch transcode a folder of videos with Handbrake's CLI

I've used Handbrake for years, to transcode practically any video file—including ripped DVDs and Blu-Rays—so I can watch the videos on practically any device. It's especially helpful for .mkv files, which can have a hodgepodge of video formats inside, and are notoriously difficult to play back, especially on older or more locked down playback devices.

But Handbrake's achilles heel, as a GUI-first application, is in a lack of easy batch operation. You can queue videos up one at a time, which is nice, but more recently, as I've ripped more TV seasons onto my NAS, I've wanted to transcode 5, 10, or 20 files at a time.

Enter HandBrakeCLI. Assuming you're on a Mac and installed Handbrake already (e.g. with brew install --cask handbrake), download HandBrakeCLI, mount the downloaded disk image, and copy the executable into a system path:

sudo cp /Volumes/HandBrakeCLI-1.5.1/HandBrakeCLI /usr/local/bin/

Then you can use it to loop over an entire directory—even recursively—and transcode all the video files within.

How to join multiple MP4 files from a GoPro with ffmpeg

I recently shot some footage with a GoPro, and realized after the fact the GoPro 'chapters' the footage around 4 GB, so I ended up with a number of 4 GB files, instead of one larger file. There are various reasons for this, but in the end, I really wanted one long file, so it would be easier to synchronize with footage from another camera and my audio recorder.

2023 Update: The following one-liner works a bit faster, and doesn't require creating all the intermediate files as the original method below did:

ffmpeg -f concat -safe 0 -i <(for f in *.MP4; do echo "file '$PWD/$f'"; done) -c copy output.mp4

This command assumes you're running the command within the same directory as all your GoPro .MP4 files, and there are no other .MP4 files in that directory.

So I found this answer on StackOverflow, which had exactly the commands I needed:

Git 2.20.1 is super slow on macOS Mojave on my work Mac

Update: I just upgraded my personal mac to 2.20.1, and am experiencing none of the slowdown I had on my work Mac. So something else is afoot. Maybe some of the 'spyware-ish' software that's installed on the work mark is making calls like lstat() super slow? Looks like I might be profiling some things on that machine anyways :)

I regularly use Homebrew to switch to more recent versions of CLI utilities and other packages I use in my day-to-day software and infrastructure development. In the past, it was necessary to use Homebrew to get a much newer version of Git than was available at the time on macOS. But as Apple's evolved macOS, they've done a pretty good job of keeping the system versions relatively up-to-date, and unless you need bleeding edge features, the version of Git that's installed on macOS Mojave (2.17.x) is probably adequate for now.

But back to Homebrew—recently I ran brew upgrade to upgrade a bunch of packages, and it happened to upgrade Git to 2.20.1.

Getting AWS STS Session Tokens for MFA with AWS CLI and kubectl for EKS automatically

I've been working on some projects which require MFA for all access, including for CLI access and things like using kubectl with Amazon EKS. One super-annoying aspect of requiring MFA for CLI operations is that every day or so, you have to update your STS access token—and also for that token to work you have to update an AWS profile's Access Key ID and Secret Access Key.

I had a little bash function that would allow me to input a token code from my MFA device and it would spit out the values to put into my .aws/credentials file, but it was still tiring copying and pasting three values every single morning.

So I wrote a neat little executable Ansible playbook which does everything for me:

To use it, you can download the contents of that file to /usr/local/bin/aws-sts-token, make the file executable (chmod +x /usr/local/bin/aws-sts-token), and run the command:

Fixing Jenkins CLI 'ERROR: anonymous is missing the Overall/Read permission'

For the past decade or so, I've been working to automate as much of a Jenkins server build process as possible. There are a few 'hacky' bits to doing so, like managing some Jenkins XML files (or if you really want to go crazy, storing your entire $JENKINS_HOME somewhere in a source control repository!).

One of the most annoying things about automating Jenkins is using the jenkins-cli.jar file to interact with Jenkins on the CLI. It doesn't come with any automated solution for authenticating with Jenkins, and is meant for running either on the same server where Jenkins is running, or really anywhere that has SSH access. I generally don't like putting any Jenkins bits (including the CLI tool) on servers outside the actual Jenkins instance itself, so I've traditionally used the --username and --password method of authenticating with jenkins-cli.

However, it seems those CLI flags were deprecated and removed at some point in the past few months (maybe around 2.130 or so?), and now I get the following error when running CLI commands that way:

Use Ansible's YAML callback plugin for a better CLI experience

Ansible is a great tool for automating IT workflows, and I use it to manage hundreds of servers and cloud services on a daily basis. One of my small annoyances with Ansible, though, is its default CLI output—whenever there's a command that fails, or a command or task that succeeds and dumps a bunch of output to the CLI, the default visible output is not very human-friendly.

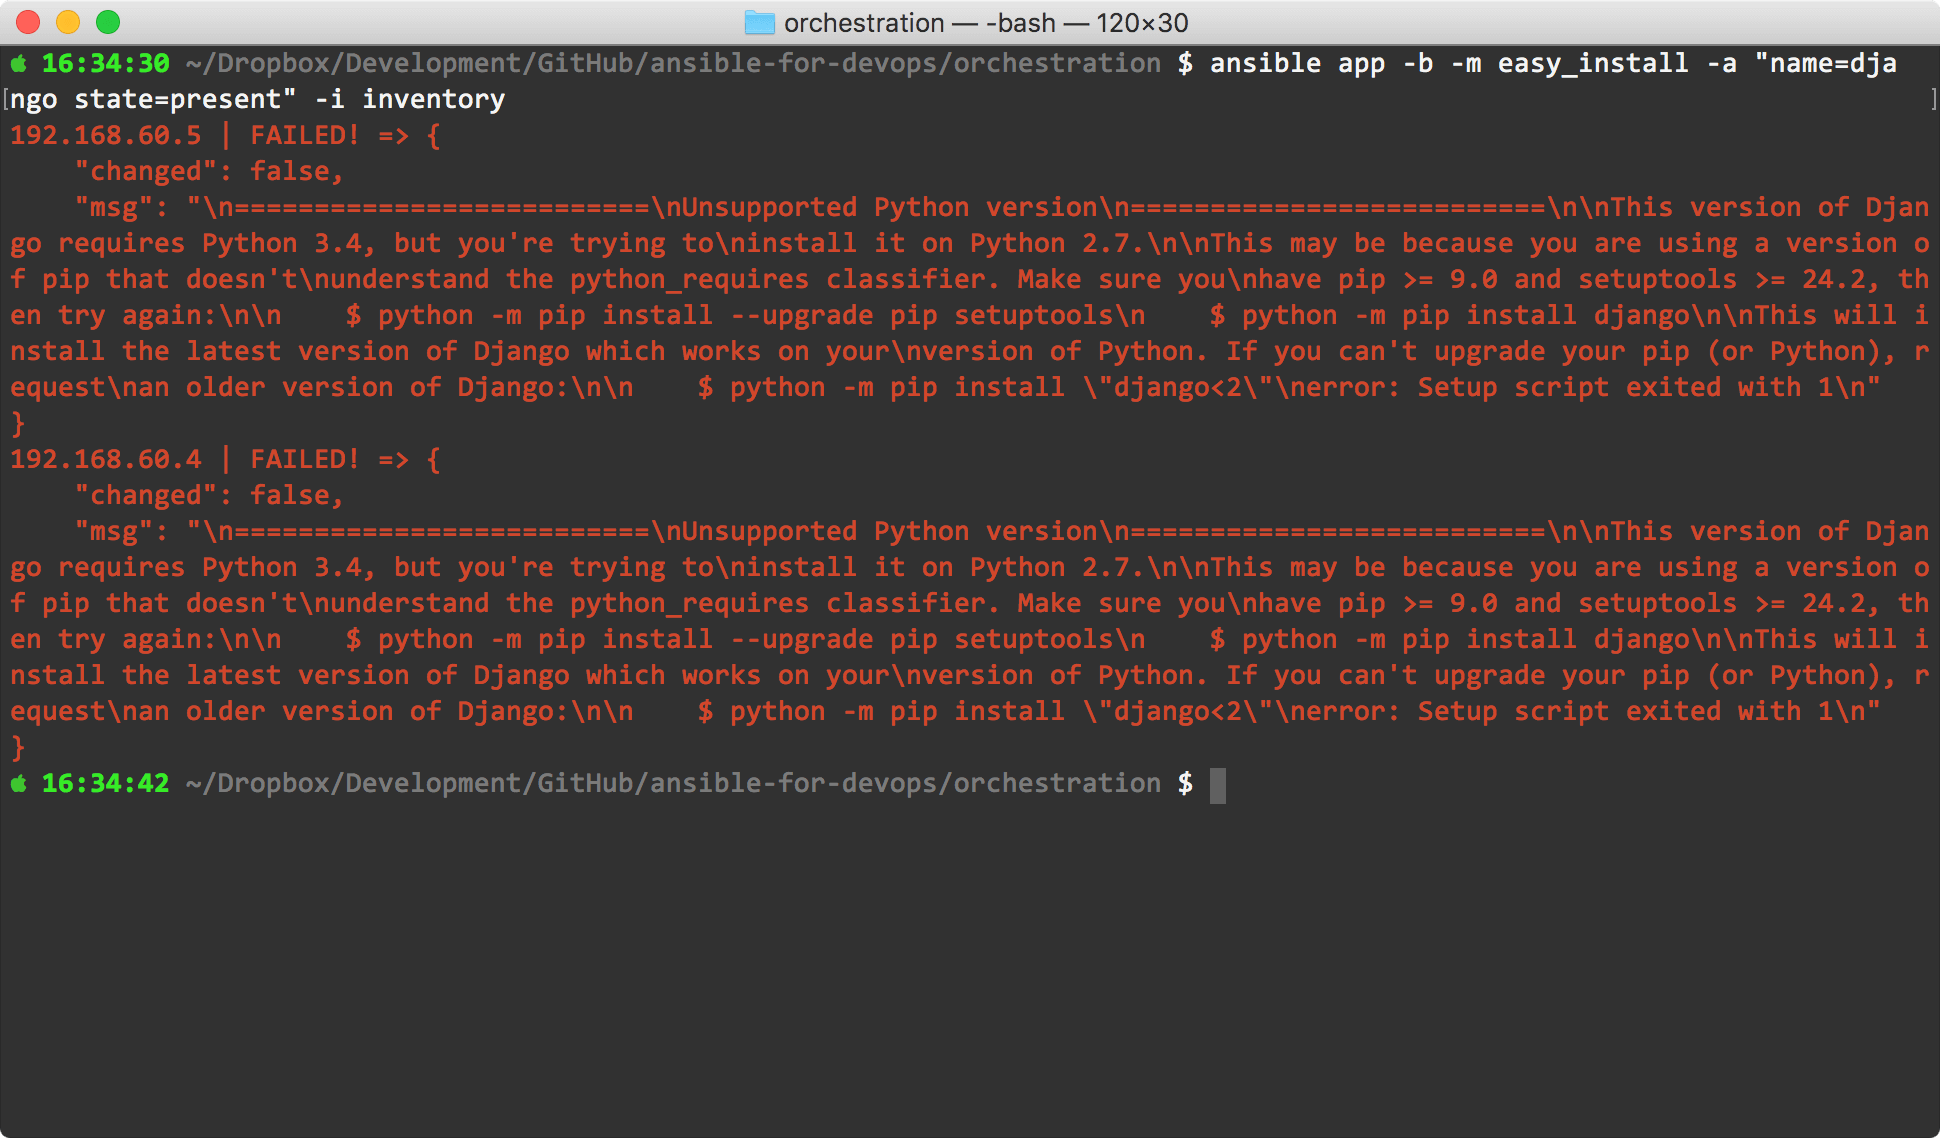
For example, in a Django installation example from chapter 3 of my book Ansible for DevOps, there's an ad-hoc command to install Django on a number of CentOS app servers using Ansible's yum module. Here's how it looks in the terminal when you run that task the first time, using Ansible's default display options, and there's a failure:

Ansible 2.5 default callback plugin

...it's not quickly digestible—and this is one of the shorter error messages I've seen!

How to set complex string variables with Drush vset

I recently ran into an issue where drush vset was not setting a string variable (in this case, a time period that would be used in strtotime()) correctly:

# Didn't work:
$ drush vset custom_past_time '-1 day'
Unknown options: --0, --w, --e, --k.  See `drush help variable-set`      [error]
for available options. To suppress this error, add the option
--strict=0.

Using the --strict=0 option resulted in the variable being set to a value of "1".

After scratching my head a bit, trying different ways of escaping the string value, using single and double quotes, etc., I finally realized I could just use variable_set() with drush's php-eval command (shortcut ev):

# Success!
$ drush ev "variable_set('custom_past_time', '-1 day');"
$ drush vget custom_past_time
custom_past_time: '-1 day'

This worked perfectly and allowed me to go make sure my time was successfully set to one day in the past.

Dump an entire database with structure only for some tables with mysqldump

I typically use a MySQL GUI like Sequel Pro when I do database dumps and imports working from my Mac. GUI apps often give checkboxes that allow you to choose whether to include the structure/content/drop table command for each table in an export.

When using mysqldump on the command line, though, it's not as simple. You can either do a full dump and exclude a few tables entirely (using --ignore-table, or dump the structures of just one set of tables using the -d option. But you can't do both in one go with mysqldump.

However, you can use the power of redirection to do both commands at once to result in one dump file with all your tables, with structure only for the tables you specify:

Using apachebench (ab) with Drupal 7 to load test site with authenticated users

apachebench is an excellent performance and load-testing tool for any website, and Drupal-based sites are no exception. A lot of Drupal sites, though, need to be measured not only under heavy anonymous traffic load (users who aren't logged in), but also under heavy authenticated-user load.

Drupal.org has some good tips for ab testing, but the details for using ab's '-C' option (notice the capital C... C is for Cookie) are lacking. Basically, if you pass the -C option with a valid session ID/cookie, Drupal will send ab the page as if ab were authenticated.

Instead of constantly going into the database and looking up session IDs and such nonsense, I have a simple script, which is quite revised from the 2008-era script originally from 2bits that worked with Drupal 5, which will give you the proper ab commands for stress-testing your Drupal site under authenticated user load. Simply copy the attached script (source pasted below) to your site's docroot, and run the command from the command line as follows: